
miata track build

Thread Starter
~~ Hardcore Newb ~~
Joined: Mar 2006
Posts: 58
From: t.
Rep Power: 739 
miata track build
I'm building up my Miata for some track use this year. Check out my build progress.
Today was the first official day of starting the long awaited work to my car. I have spent the winter buying up parts and slowly the basement was filling up. I brought the car out of storage a couple weeks ago, and have not done much except wash it a couple times - until now!
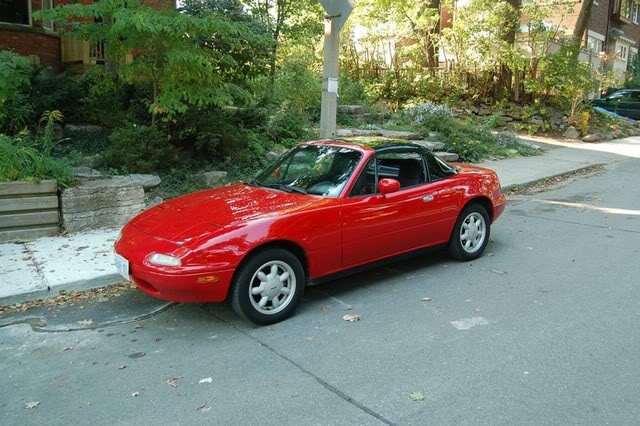
Here is a pic of my car taken last summer, pretty much stock, with a black hardtop courtesy of Rev9 Autosport. http://www.rev9autosport.com
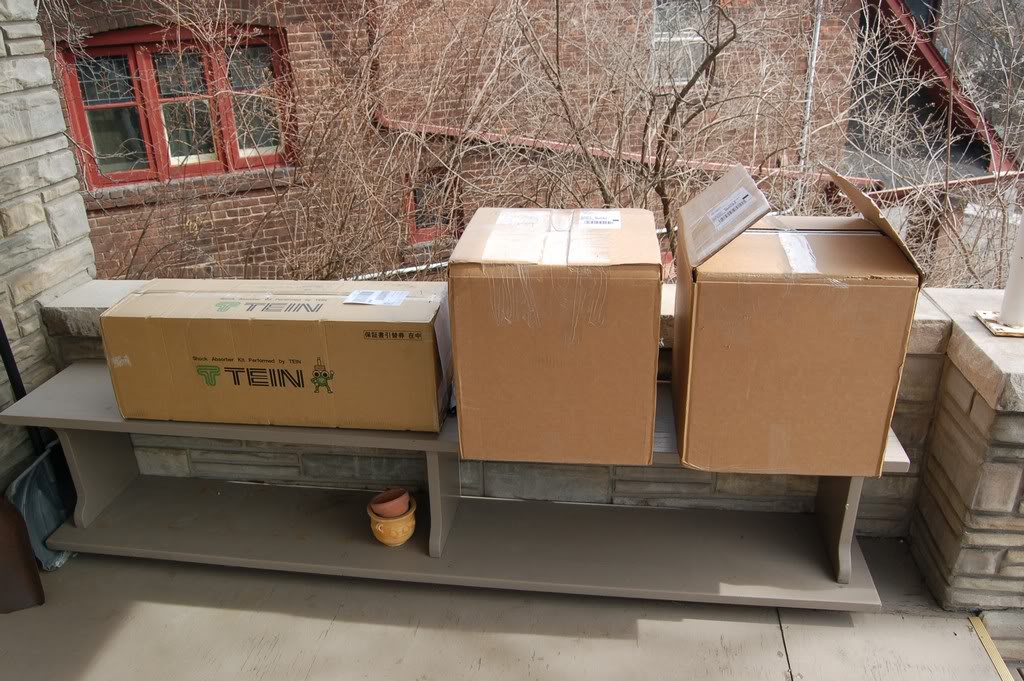
This saga really starts here - my US postal drop where I have been sending all my parts for the last month or so, in addition to what I had stockpiled in the basement. Long story short, they are really nice folks down there but they were getting irritated with the amount of parcels I had accumulated, so I had to go down on Friday, even before my coilovers and rims arrived.
I saved a ton on duties (still had to pay, but whatever) and delivery costs by doing it this way.

Since I obviously wasn't taking the Miata, I had to rent a vehicle - I got the largest non-truck I could:
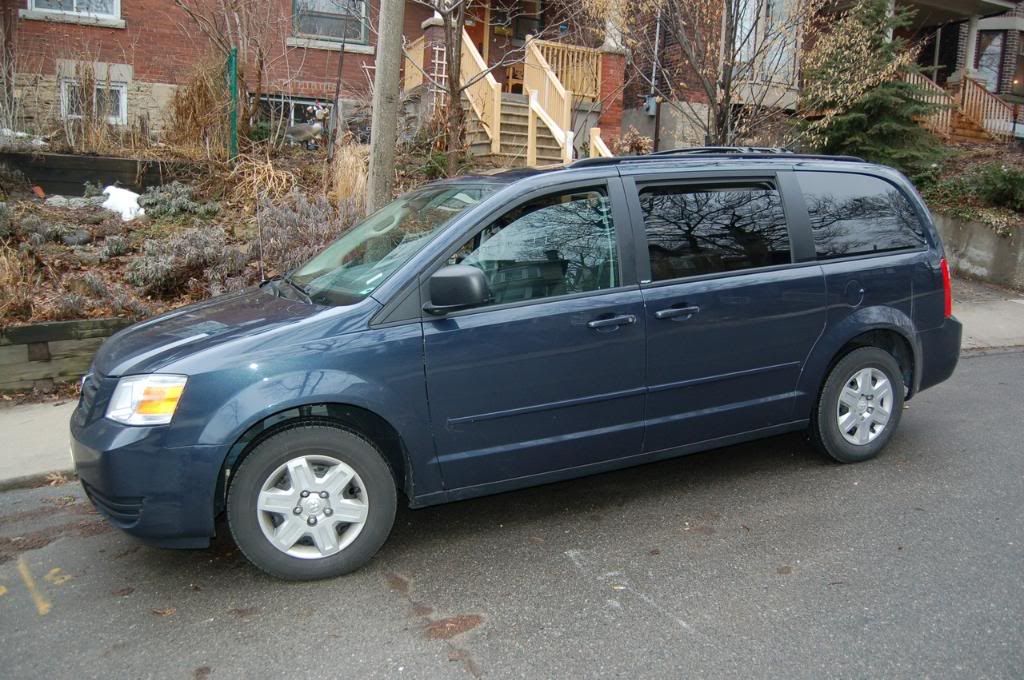
Was great for the drive down (in the rain, yay) and held every thing I had down there.
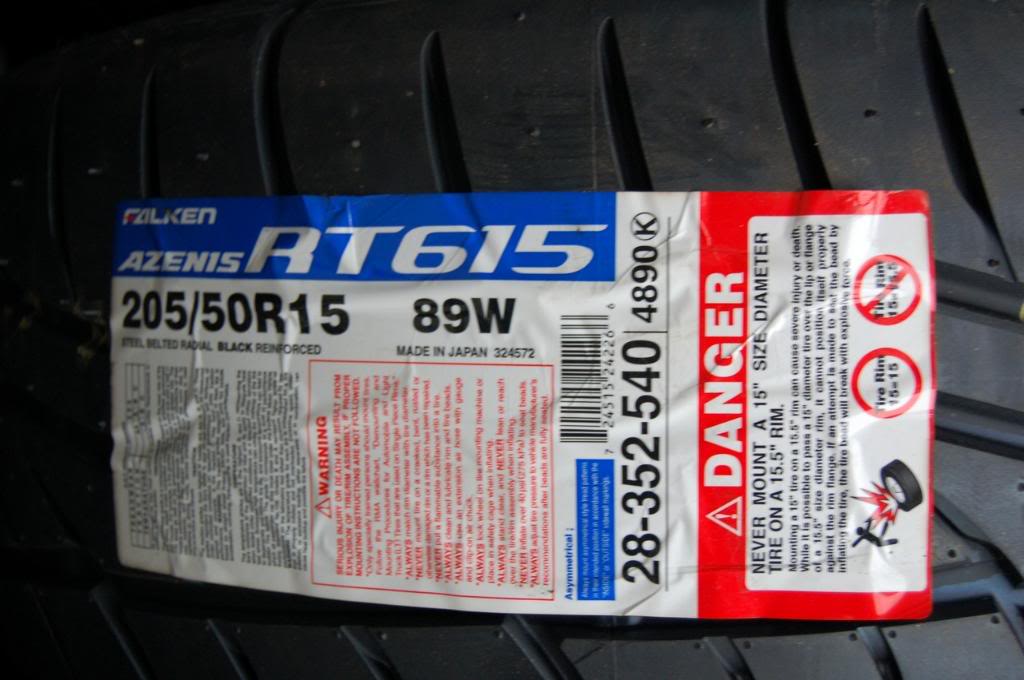
Yup, got some cheap shoes for $72 a piece from Vulcan Tire.

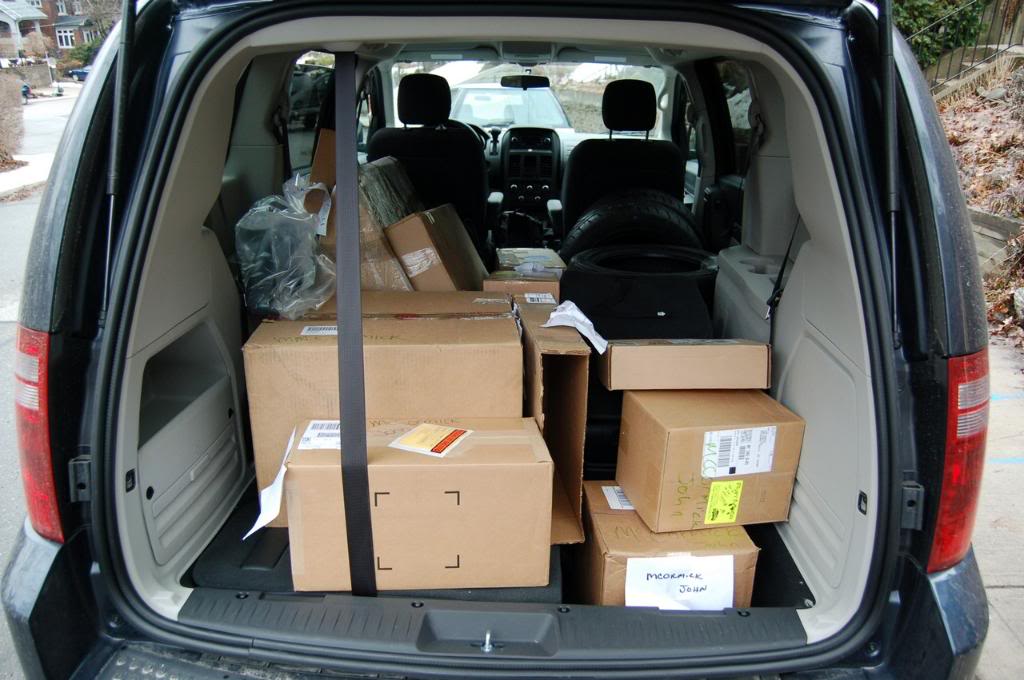
Everything unloaded on the porch. OEM lip, stereo, Energy Suspension bushing set, Flyin Miata frame rails and high-flow cat, new Hella headlights, Hard Dog Rollbar (which I already wrecked by with my box cutter, hella noob move), some spare parts from Rosenthal Mazda, etc etc. Enkei RPF1's and Tein Flex will be ready for pickup next week, so I will be going down there again.
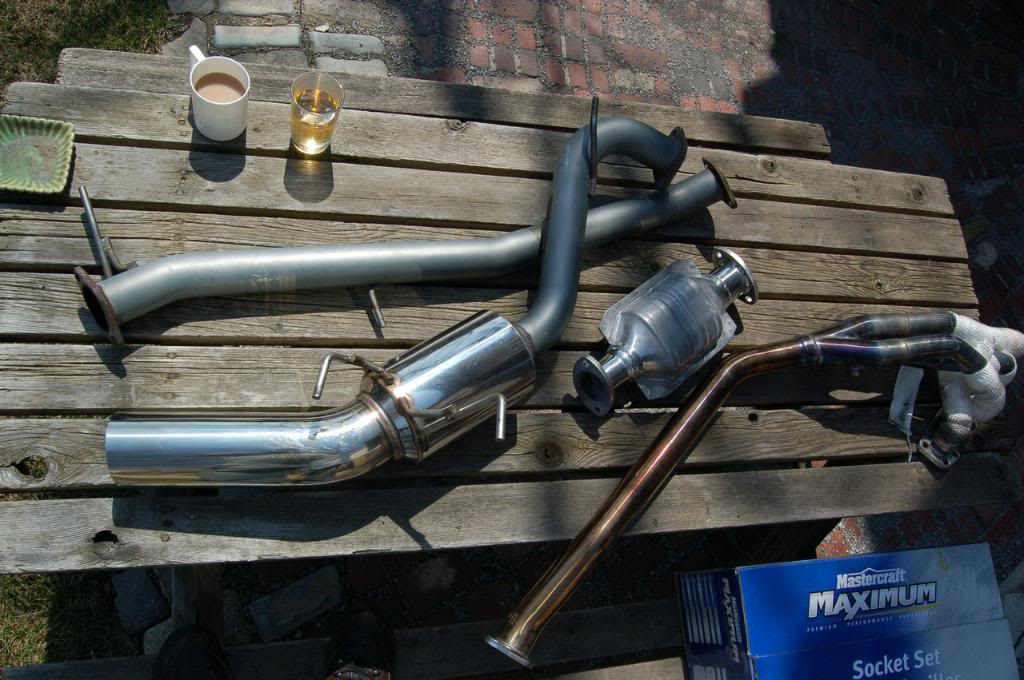
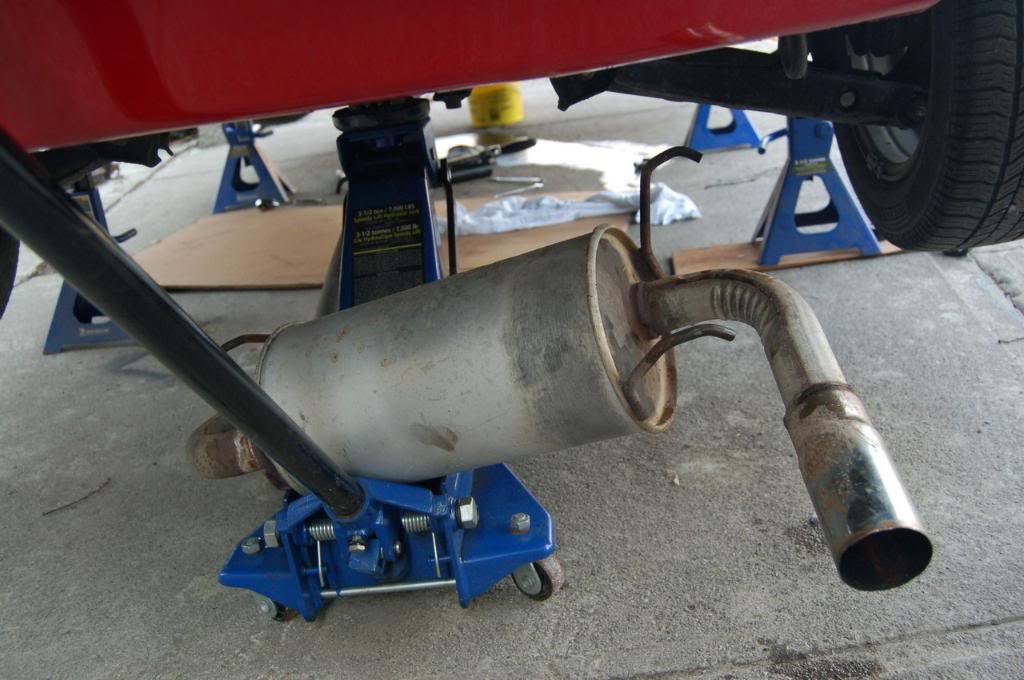
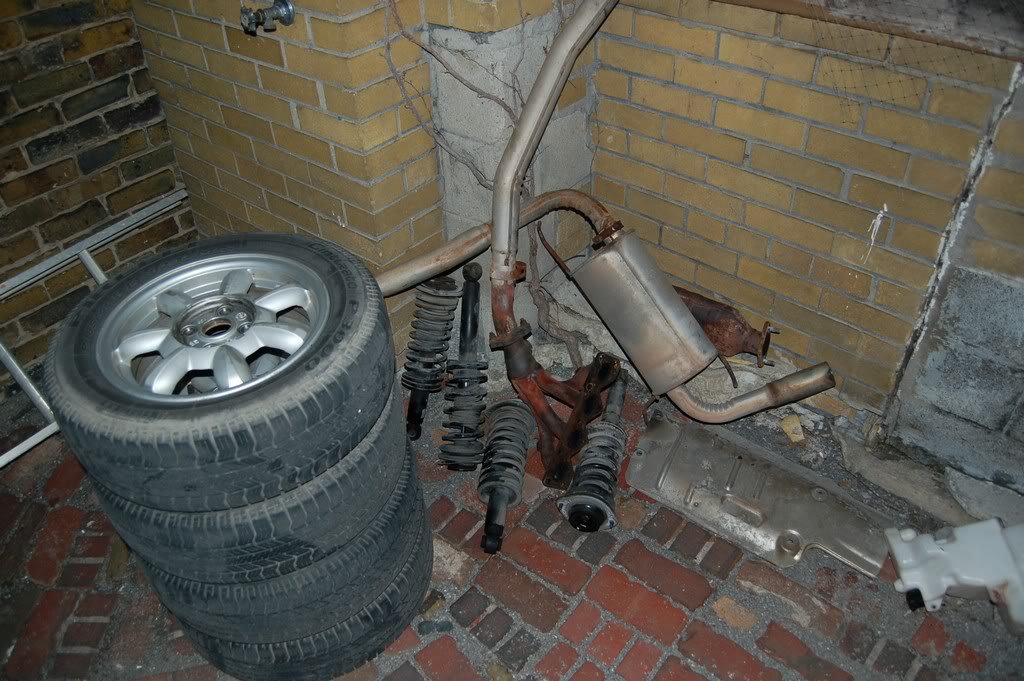
OK, on to the build. Today's objective was to rip out the stock exhaust, cat and header. All going to the dump, to replaced with these bits:
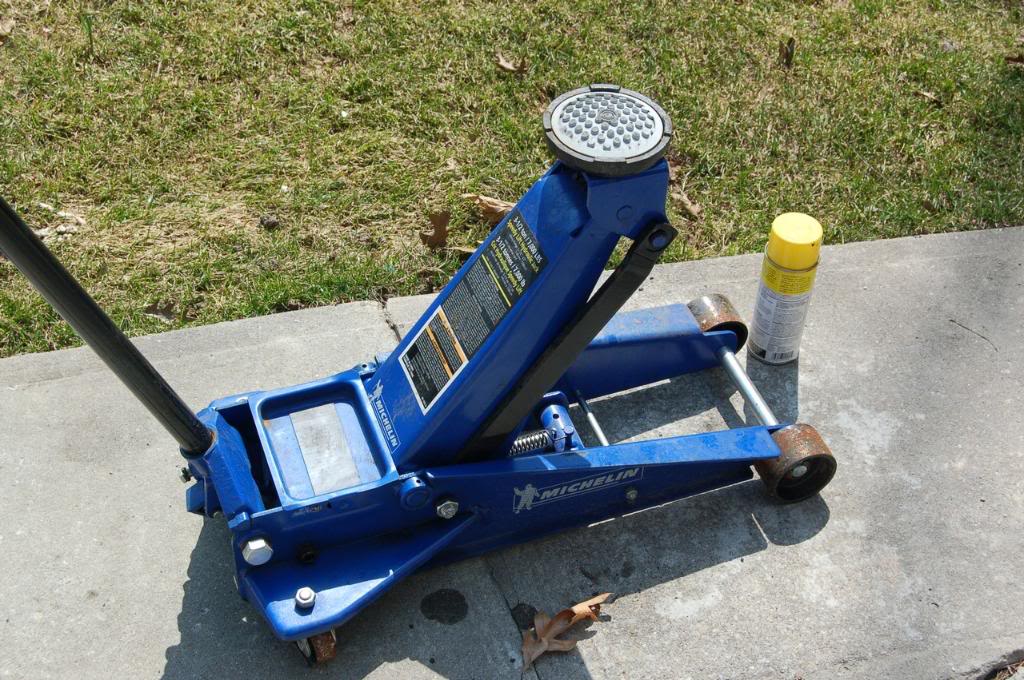
Topping the list of stupid things I have done lately - leaving my brand new jack out for the whole winter, under alot of snow and crud. But it still works great, and I gave it a shot of PB Blaster in some areas:
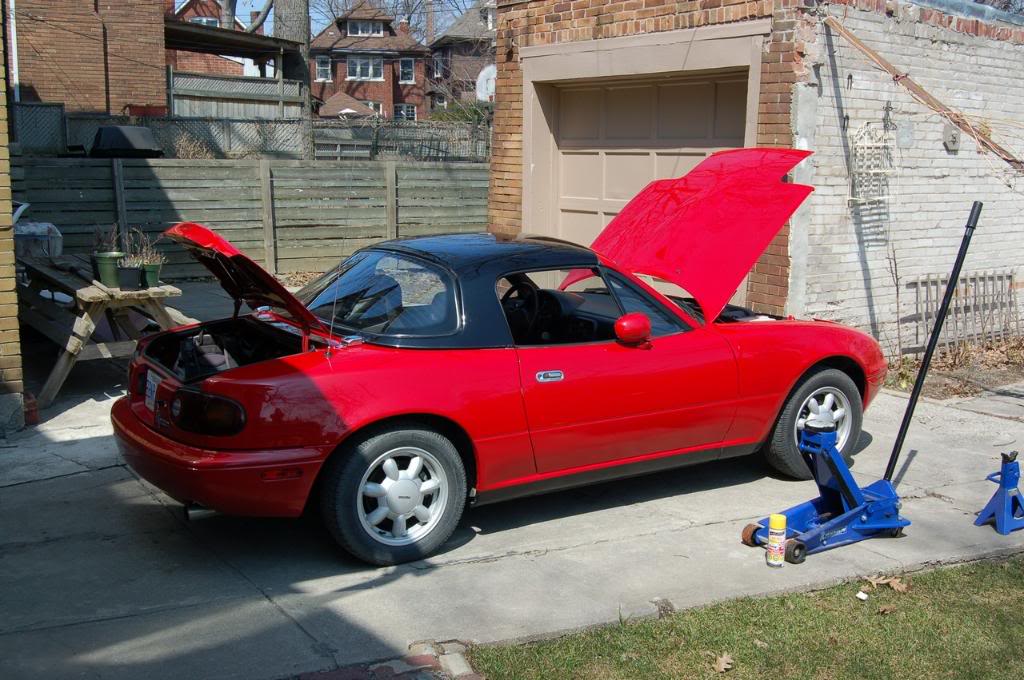
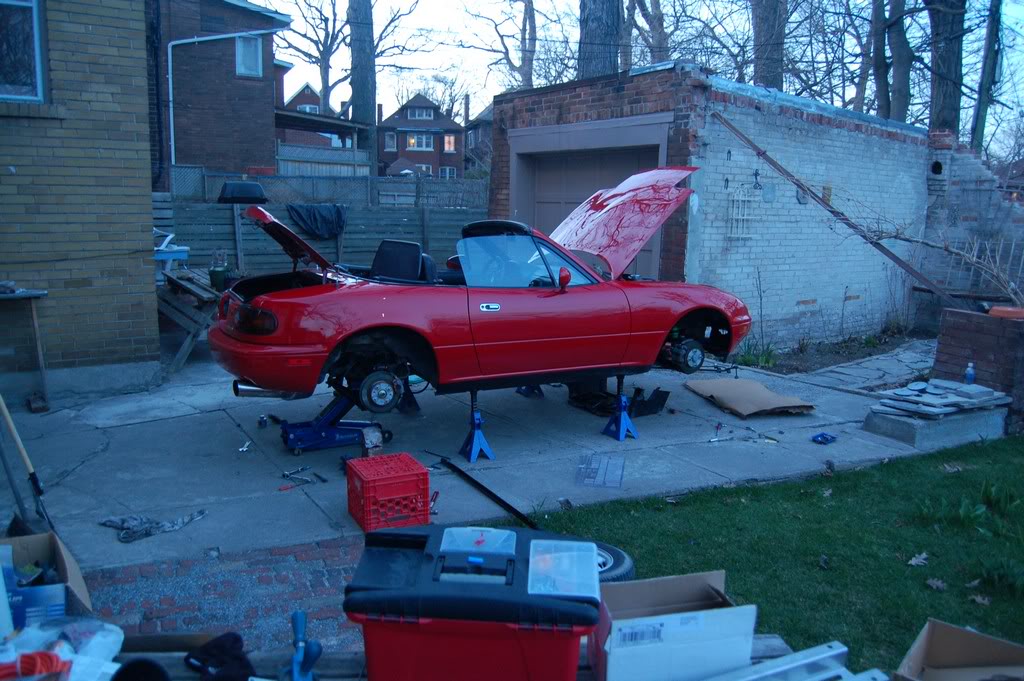
Here's the work area, my back yard. Enough space for the Miata, not much else.
First order of business, disconnect the battery before doing any work. I hadn't really done this before on the car, since I didn't really care for it. However, I want to do things 'right', so I am rewarded with this:
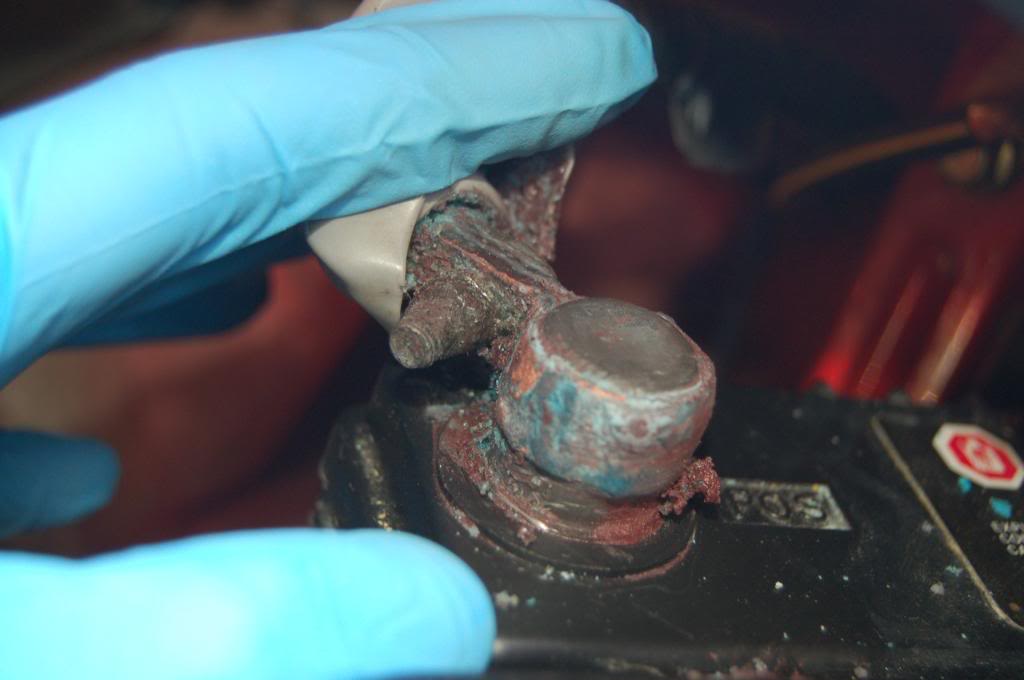
And this:
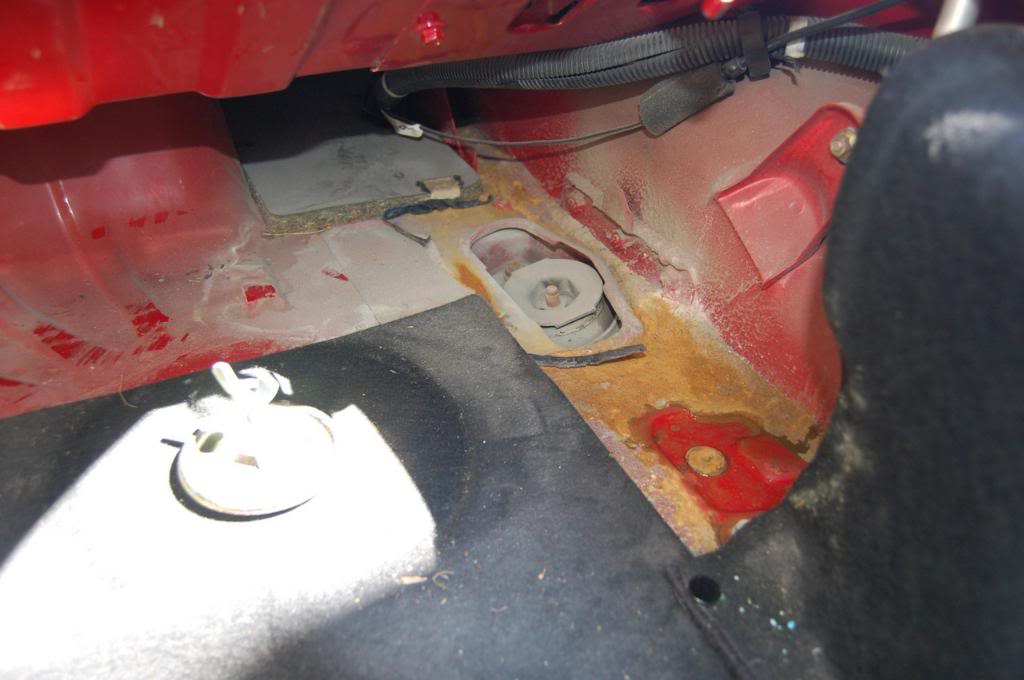
Ugh, there goes another afternoon. I'll have to clean it up, seal up the bad spots and get a new connector for the battery, as this one is cleary toasted.

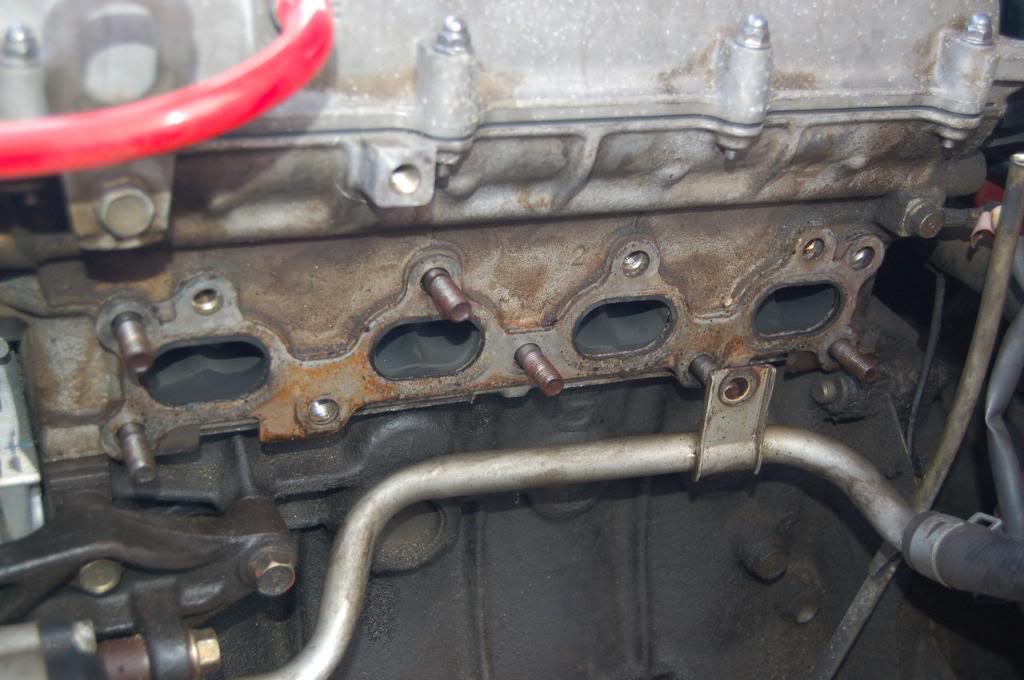
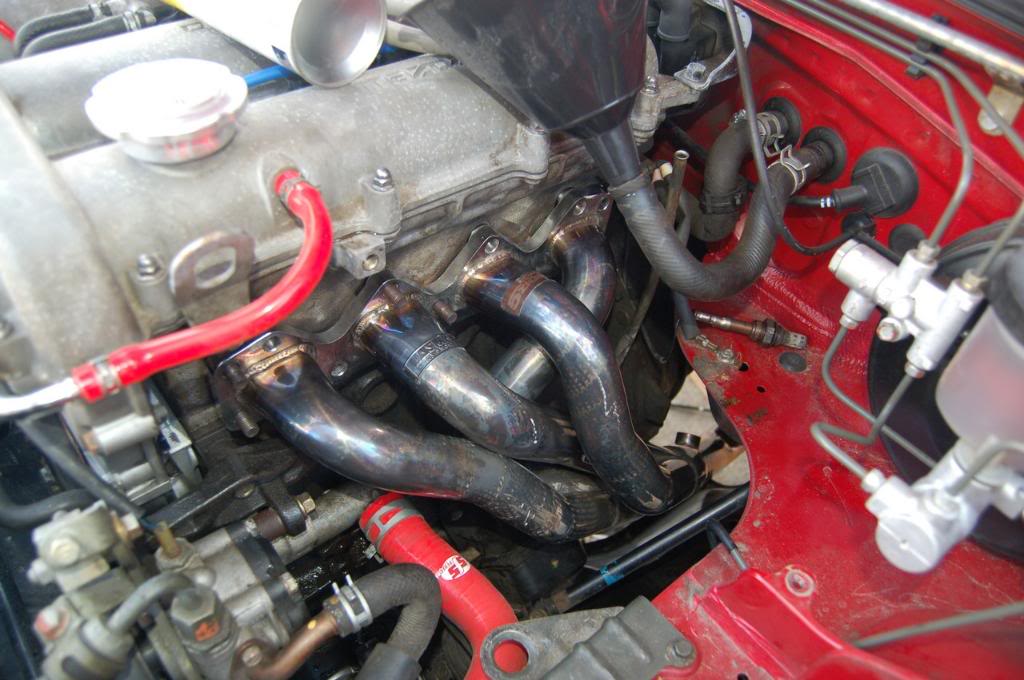
A look at the stock header before taking anything apart. The nuts all came off very easily, after some PB Blaster was applied. Some of the bolts came out of the block, but that is not a huge deal.
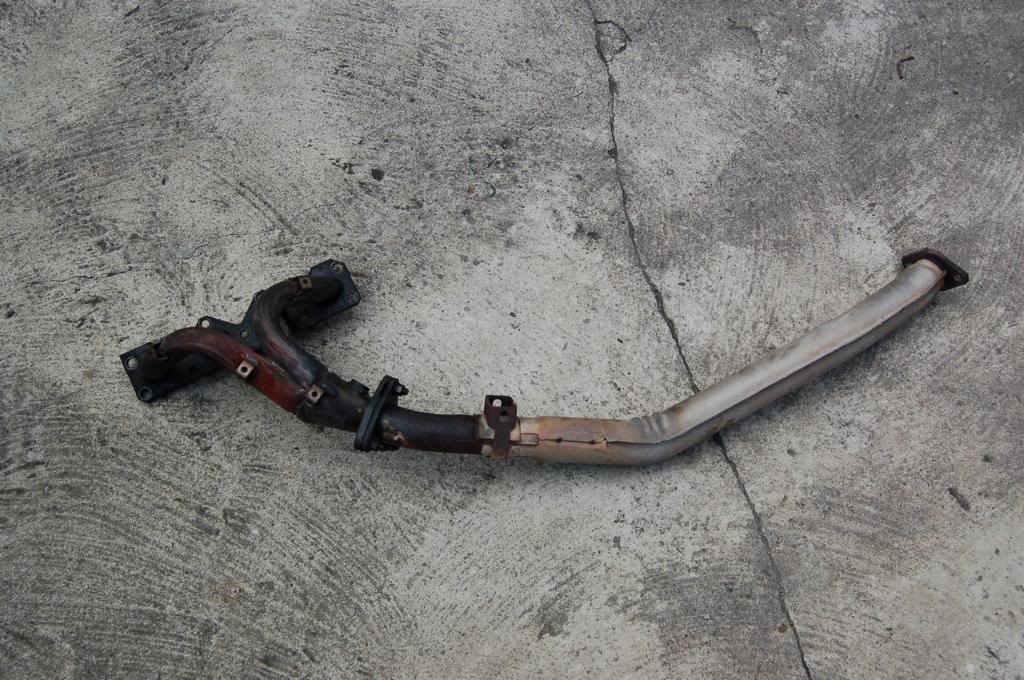
Old header removed, glad I won't be seeing it again.
The heater hose was really getting in the way, so like a noob I decided to remove it. Much to my disappointment, coolant started leaking everywhere, duh. I dicked around with it for a bit, taking it out for a second, watching the coolant flow out, fill up a plastic bottle, then I just said screw it - I drained the coolant so I could work without it in the way.
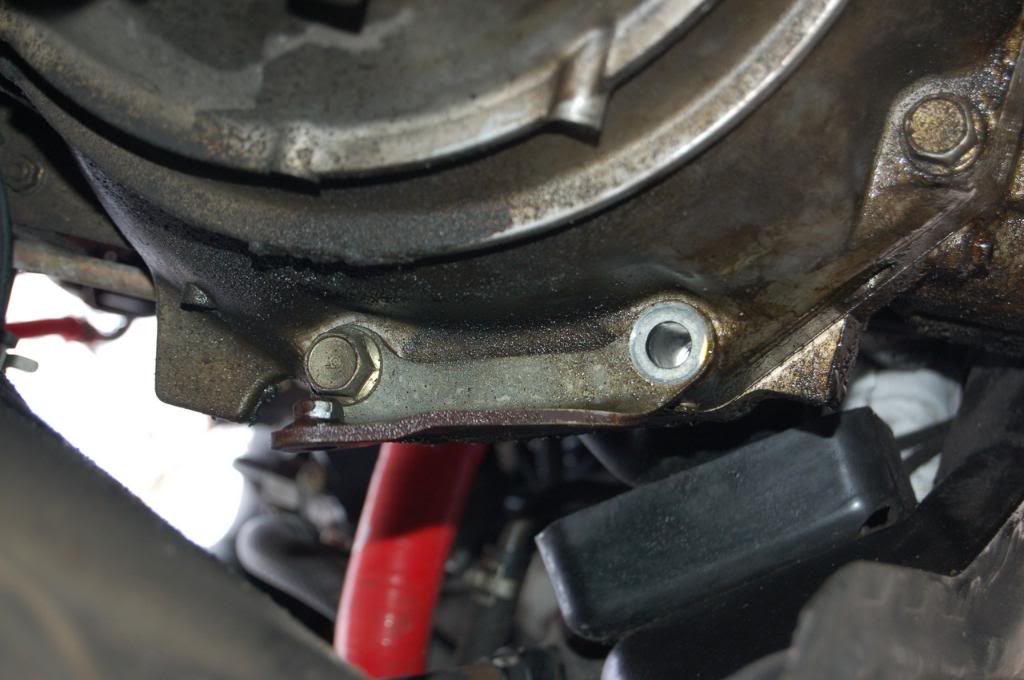
The 5Zigen header would not go in without this bracket being removed. Some PB Blaster, a PVC extension pipe and a busted elbow was all it took to get the bolts out.
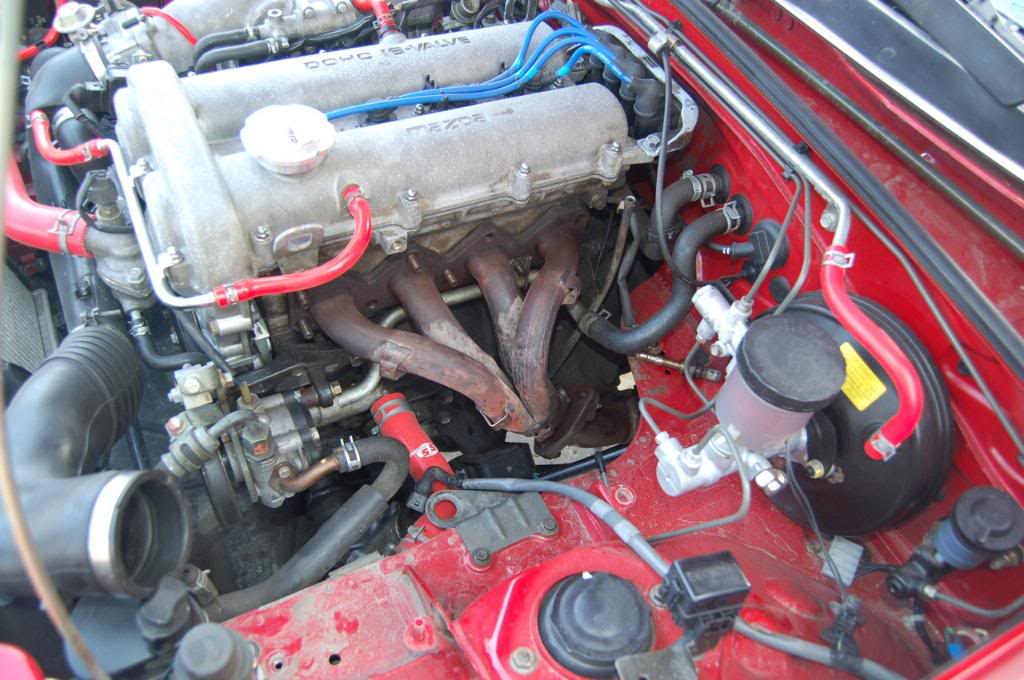
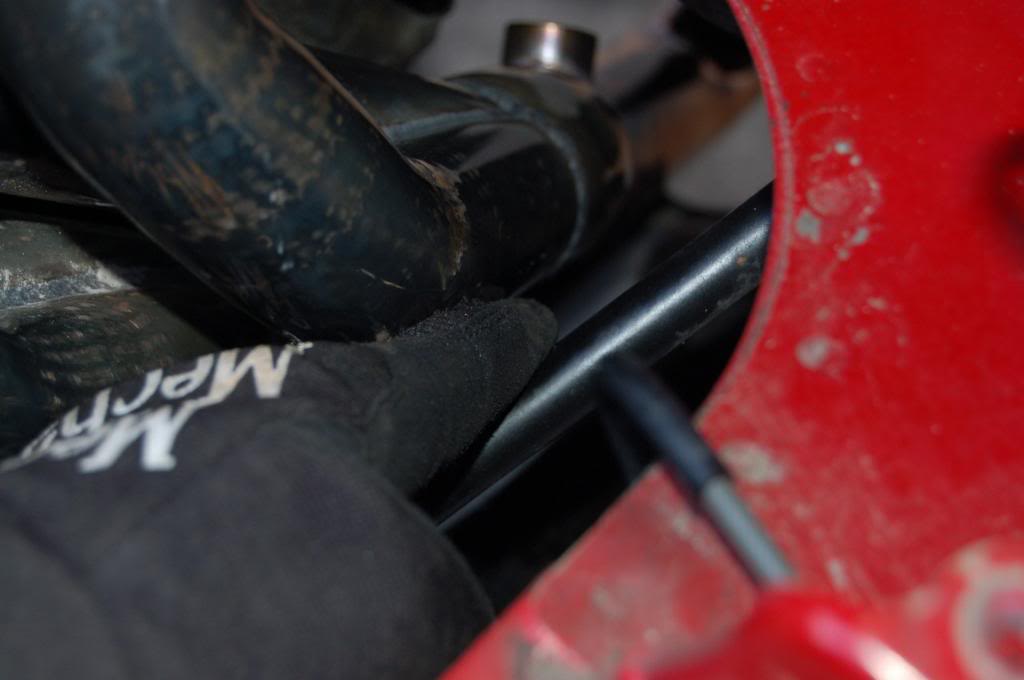
Test fit of the header. I finally got it on, after some wiggling. There was some speculation that this header would not fit since it appears to be a JDM one, and the steering colum would get in the way. I hemmed and hawwed, came back a couple minutes later and put it right into place with no modifications after some more wiggling.
Lots of space between the header and steering linkage, so it should work fine. I didn't completely install the header because I had some heat wrap to put on as well. Another noob move, I only got 50 feet of 1" tape, so it's gonna be tight. I got frustrated with the wrapping, which was surprising since I have been doing it to road bicycles since I was 13, so I gave up and left it for tommorow.
Day 2 of my build. Long story short the new header/cat/exhaust is down right evil sounding! Not only that, it pulls alot better, seems much faster. Sorry, butt dyno only, but in comparison to stock this thing just comes alive now. At first it was quite loud in the car and with the hardtop on but seems to have quieted down a bit, but damn when you hit the throttle it snarls. Not ricey sounding either, but hell, I'm sure alot of people who don't know better will shake their heads.
I want to get a video for you guys so you can check it out. I'm sure it's comparable to most of the other RSR setups up there but I'm not sure if there is one with this cat and header rolling around.
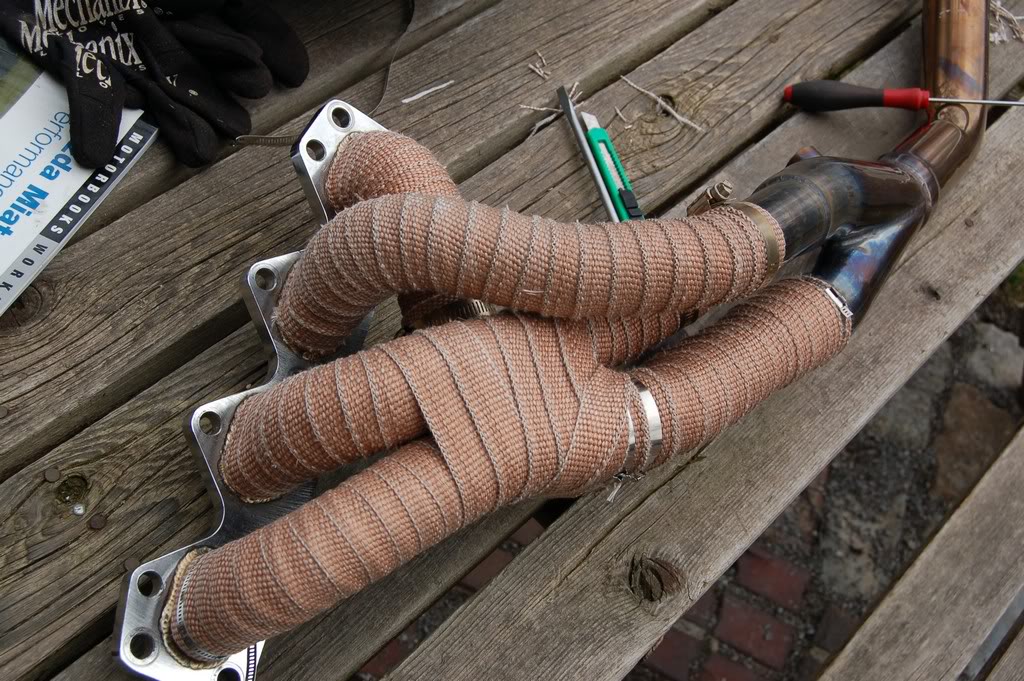
OK, back to business this morning with the header wrap. I finally got things going my way, but it still wasn't perfect at the end. Given all the bends and obsructions with this header, I wasn't really surprised and if you look at it the right way (see photos) you can't see the spots I couldn't get. There are only about 2 nickel and quarter sized spots on the #4 pipe that didn't get wrapped. No big deal, I made up for it in other places.
Frontside
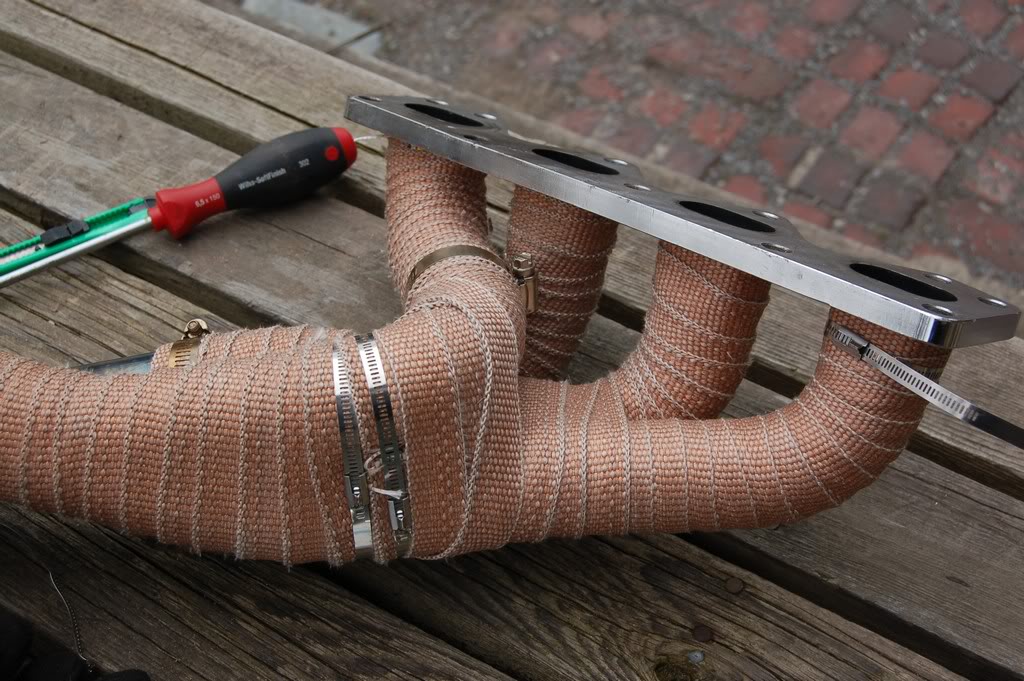
Backside
I ended up have to shorten up one of the 2-1 wraps since it interfered with the steering colum, there is not alot of clearance there when getting the header in. The oxygen sensor also sits down further, but is actually easier to get to with the wrench now and there is enough cable.
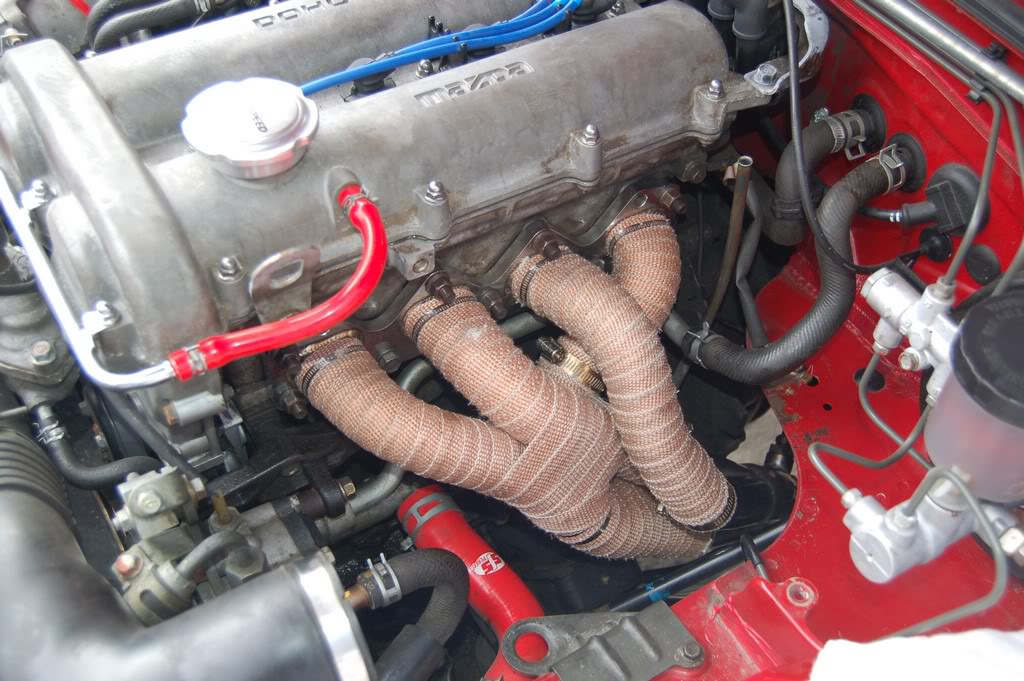
All in!!! Only ran into one wrinkle, there was a half-assed bolt used in place of the real nuts and bolts going into the head and I ended up stripping the head by wrenching this little 'orphan' too tight. Oh well, not much to be done and I was not concerned since the other 8-9 bolts are good a tight. I pray for no leaks!

Clearance shot with header wrap and clamp.

Cat. Nothing very exciting here, it all bolted together really well, and no leakage.
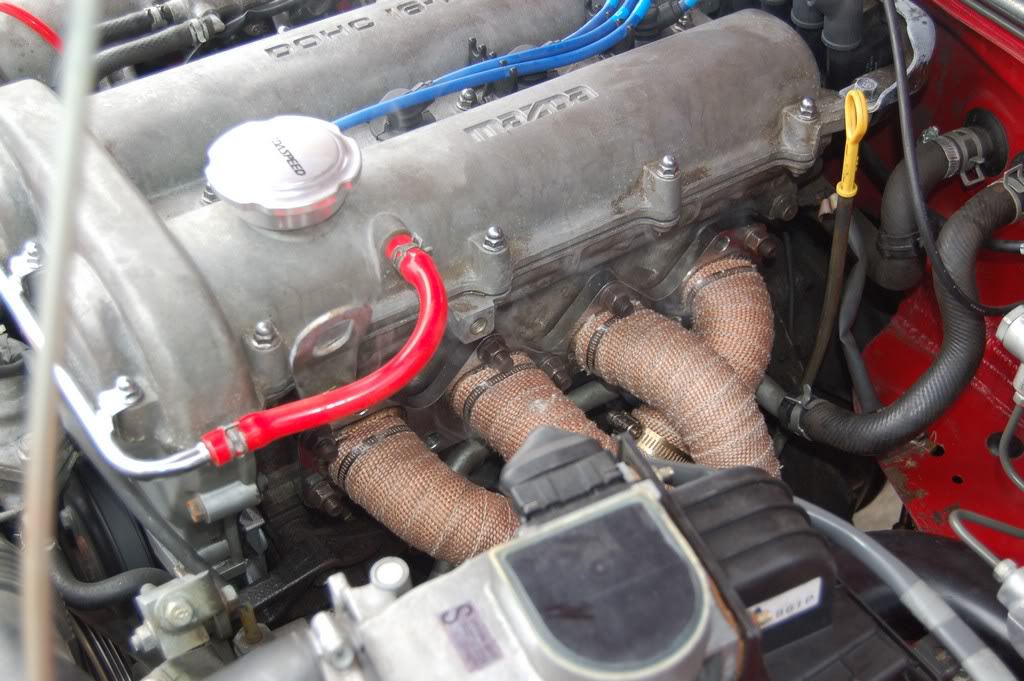
Final shot of the bay with the air box and bits back in. After warming up the header wrapped got a bit darker. Had only some mild smoking as it idled for about 10 minutes. No exhaust leaks either, nice.

I also added the OEM front lip today. Didn't bother painting it, got too impatient!!!
I'll be back in a couple days as I do more of the build, I'm off to NY to get some more parts on Thursday.
Today was the first official day of starting the long awaited work to my car. I have spent the winter buying up parts and slowly the basement was filling up. I brought the car out of storage a couple weeks ago, and have not done much except wash it a couple times - until now!
Here is a pic of my car taken last summer, pretty much stock, with a black hardtop courtesy of Rev9 Autosport. http://www.rev9autosport.com
This saga really starts here - my US postal drop where I have been sending all my parts for the last month or so, in addition to what I had stockpiled in the basement. Long story short, they are really nice folks down there but they were getting irritated with the amount of parcels I had accumulated, so I had to go down on Friday, even before my coilovers and rims arrived.
I saved a ton on duties (still had to pay, but whatever) and delivery costs by doing it this way.
Since I obviously wasn't taking the Miata, I had to rent a vehicle - I got the largest non-truck I could:
Was great for the drive down (in the rain, yay) and held every thing I had down there.
Yup, got some cheap shoes for $72 a piece from Vulcan Tire.
Everything unloaded on the porch. OEM lip, stereo, Energy Suspension bushing set, Flyin Miata frame rails and high-flow cat, new Hella headlights, Hard Dog Rollbar (which I already wrecked by with my box cutter, hella noob move), some spare parts from Rosenthal Mazda, etc etc. Enkei RPF1's and Tein Flex will be ready for pickup next week, so I will be going down there again.
OK, on to the build. Today's objective was to rip out the stock exhaust, cat and header. All going to the dump, to replaced with these bits:
Topping the list of stupid things I have done lately - leaving my brand new jack out for the whole winter, under alot of snow and crud. But it still works great, and I gave it a shot of PB Blaster in some areas:
Here's the work area, my back yard. Enough space for the Miata, not much else.
First order of business, disconnect the battery before doing any work. I hadn't really done this before on the car, since I didn't really care for it. However, I want to do things 'right', so I am rewarded with this:
And this:
Ugh, there goes another afternoon. I'll have to clean it up, seal up the bad spots and get a new connector for the battery, as this one is cleary toasted.
A look at the stock header before taking anything apart. The nuts all came off very easily, after some PB Blaster was applied. Some of the bolts came out of the block, but that is not a huge deal.
Old header removed, glad I won't be seeing it again.
The heater hose was really getting in the way, so like a noob I decided to remove it. Much to my disappointment, coolant started leaking everywhere, duh. I dicked around with it for a bit, taking it out for a second, watching the coolant flow out, fill up a plastic bottle, then I just said screw it - I drained the coolant so I could work without it in the way.
The 5Zigen header would not go in without this bracket being removed. Some PB Blaster, a PVC extension pipe and a busted elbow was all it took to get the bolts out.
Test fit of the header. I finally got it on, after some wiggling. There was some speculation that this header would not fit since it appears to be a JDM one, and the steering colum would get in the way. I hemmed and hawwed, came back a couple minutes later and put it right into place with no modifications after some more wiggling.
Lots of space between the header and steering linkage, so it should work fine. I didn't completely install the header because I had some heat wrap to put on as well. Another noob move, I only got 50 feet of 1" tape, so it's gonna be tight. I got frustrated with the wrapping, which was surprising since I have been doing it to road bicycles since I was 13, so I gave up and left it for tommorow.
Day 2 of my build. Long story short the new header/cat/exhaust is down right evil sounding! Not only that, it pulls alot better, seems much faster. Sorry, butt dyno only, but in comparison to stock this thing just comes alive now. At first it was quite loud in the car and with the hardtop on but seems to have quieted down a bit, but damn when you hit the throttle it snarls. Not ricey sounding either, but hell, I'm sure alot of people who don't know better will shake their heads.
I want to get a video for you guys so you can check it out. I'm sure it's comparable to most of the other RSR setups up there but I'm not sure if there is one with this cat and header rolling around.
OK, back to business this morning with the header wrap. I finally got things going my way, but it still wasn't perfect at the end. Given all the bends and obsructions with this header, I wasn't really surprised and if you look at it the right way (see photos) you can't see the spots I couldn't get. There are only about 2 nickel and quarter sized spots on the #4 pipe that didn't get wrapped. No big deal, I made up for it in other places.
Frontside
Backside
I ended up have to shorten up one of the 2-1 wraps since it interfered with the steering colum, there is not alot of clearance there when getting the header in. The oxygen sensor also sits down further, but is actually easier to get to with the wrench now and there is enough cable.
All in!!! Only ran into one wrinkle, there was a half-assed bolt used in place of the real nuts and bolts going into the head and I ended up stripping the head by wrenching this little 'orphan' too tight. Oh well, not much to be done and I was not concerned since the other 8-9 bolts are good a tight. I pray for no leaks!
Clearance shot with header wrap and clamp.
Cat. Nothing very exciting here, it all bolted together really well, and no leakage.
Final shot of the bay with the air box and bits back in. After warming up the header wrapped got a bit darker. Had only some mild smoking as it idled for about 10 minutes. No exhaust leaks either, nice.
I also added the OEM front lip today. Didn't bother painting it, got too impatient!!!
I'll be back in a couple days as I do more of the build, I'm off to NY to get some more parts on Thursday.


Thread Starter
~~ Hardcore Newb ~~
Joined: Mar 2006
Posts: 58
From: t.
Rep Power: 739
You should get one. The aftermarket is pretty good and it's a great car all around, if you don't need to drive it in the winter. BTW, only people on this site say it's a girlie car. Just my experience. If you want power, turbo is the only way to go. Hell, my Miata only makes about 100 hp but it's still fun. Moms in minivans can still whoop you though, so it's sad in that respect, but everywhere else it's great.
I forgot to add the part with the RSR exhaust - super rare for the Miata as it's out of production now but I snagged one used. Pics down below.
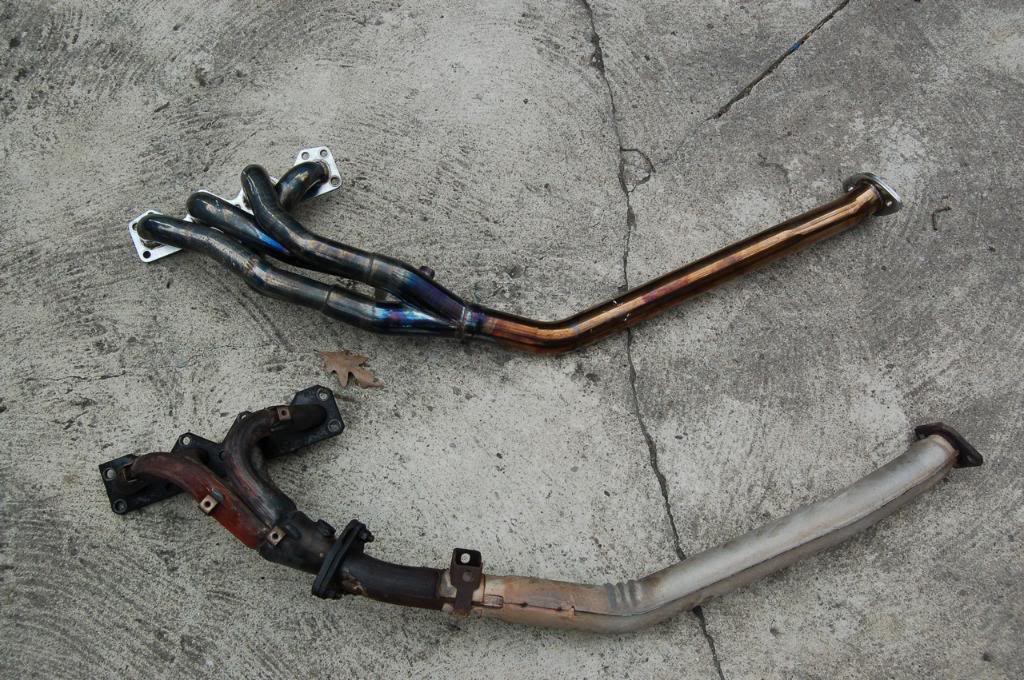
Comparo of stock and elite header.
I went back to the other stuff, since I was glad the header would fit, and proceeded to remove the rest of the stock system from the car. Seeya!
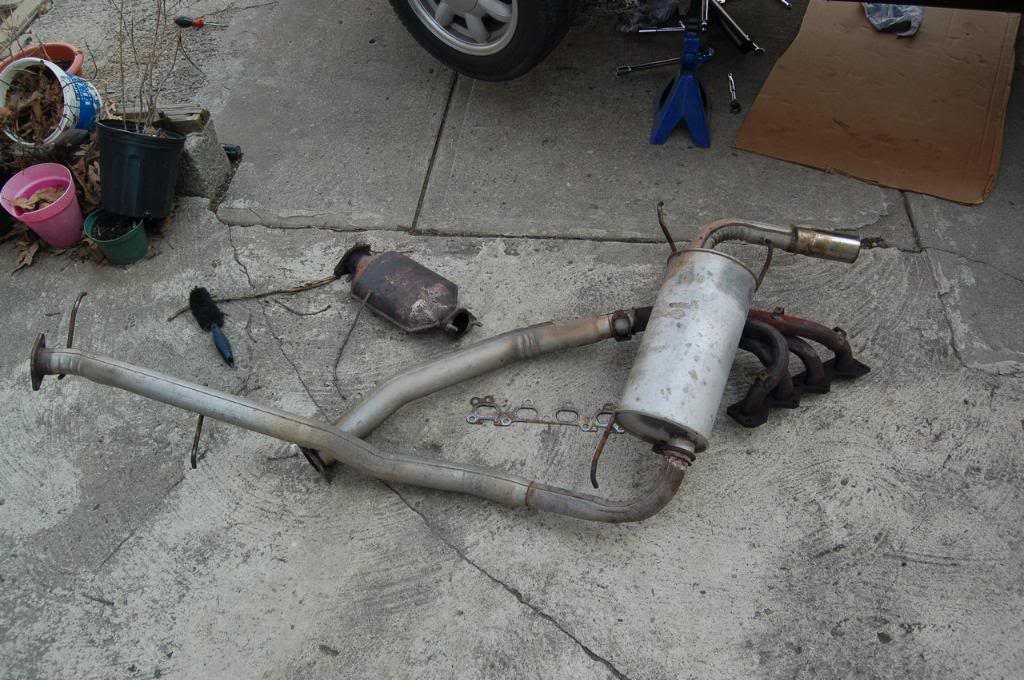
Hopefully I can get rid of this somewhere.
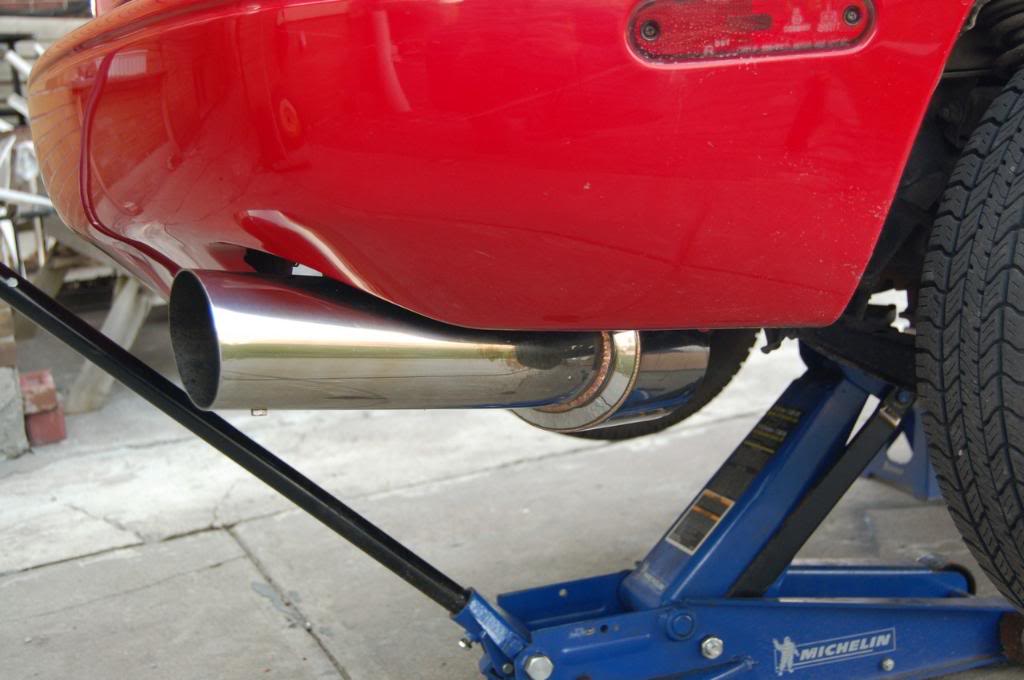
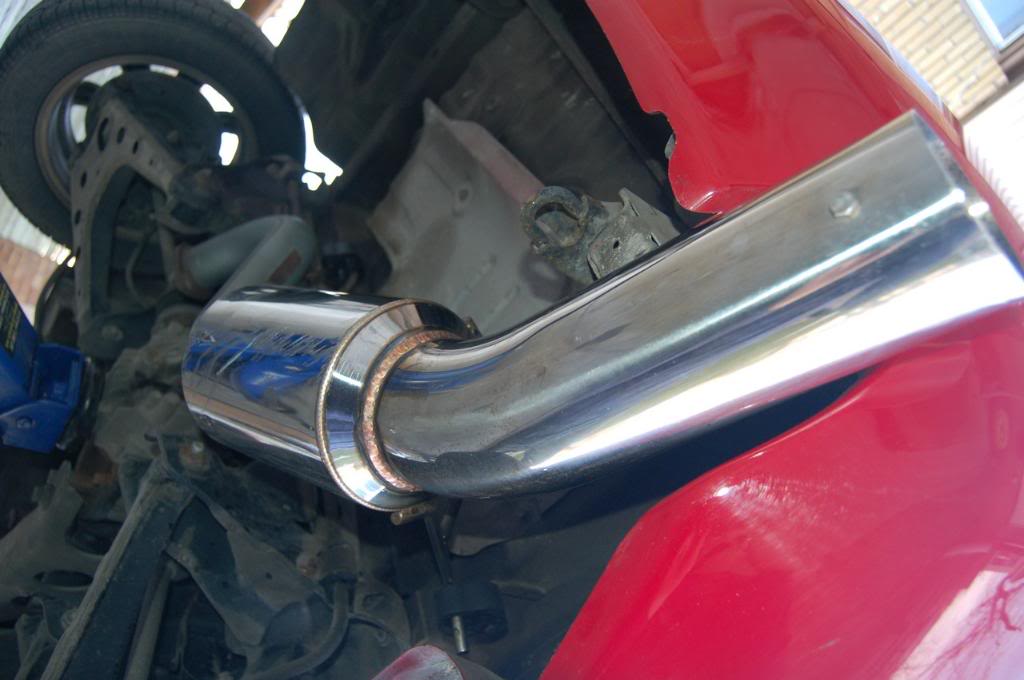
New RSR fitted, very nicely
Under side shot.
With the car right up on the jacks I poked around the chassis a bit more. This is the state it's in now, which is not terrible for a 18 year old Canadian car. The control arms and bits have some faint rusting, which I will take care of when I do the bushing install later in the season. They will get cleaned up and painted a fresh coat of black.
I forgot to add the part with the RSR exhaust - super rare for the Miata as it's out of production now but I snagged one used. Pics down below.
Comparo of stock and elite header.
I went back to the other stuff, since I was glad the header would fit, and proceeded to remove the rest of the stock system from the car. Seeya!
Hopefully I can get rid of this somewhere.
New RSR fitted, very nicely
Under side shot.
With the car right up on the jacks I poked around the chassis a bit more. This is the state it's in now, which is not terrible for a 18 year old Canadian car. The control arms and bits have some faint rusting, which I will take care of when I do the bushing install later in the season. They will get cleaned up and painted a fresh coat of black.


Thread Starter
~~ Hardcore Newb ~~
Joined: Mar 2006
Posts: 58
From: t.
Rep Power: 739
Customs? No, not exactly sure what that is in terms of paying.
Duties? No, although I'm sure some of my stuff *should* have duty applied to it.
Taxes, yes, GST and PST.
I had to pay tax on everything I declared, which was fine with me. They didn't charge me on duty for things made outside the US or Canada, such as the tires which were made in Japan. Mind you, that time they didn't look too closely either. I gave them all my receipts (most in the form of emails since I ordered it all online) and they added it up and charged me GST and PST.
Now, the second time I went down to get the coilovers (made in Japan) and wheels (also made in Japan) they didn't look closely again... so I'm not sure what the deal is there. But this time around, they passed me off to another guy who took my paperwork and disappeared for 5 minutes. They never actually checked my vehicle and I had quite a few bucks worth of stuff each time I went.
I suspect he was going to the vendors websites to double check and see if the posted prices were the same that I had on my invoices. It's pretty easy to fudge stuff, since it's just an email, and it did cross my mind. But it's not worth trying to get cute with them, they hold all the cards, and at the end of the day you are just another scammer getting busted.
If you get busted not declaring or changing receipts you a) get put on a blacklist for 5 years so when you cross you get the special treatment everytime, b) have to pay for all fees you tried to scam them on, and c) you cannot carry liqour across the border for 5 years.
Aside from that it's a great way to get parts and you save a bundle as long as you can handle paying taxes, which is not that much really, 14%.


Thread Starter
~~ Hardcore Newb ~~
Joined: Mar 2006
Posts: 58
From: t.
Rep Power: 739
Time for another update. I've been driving the car around with the new exhaust setup and it's working quite well - increased acceleration and it winds out so much quicker than the stock setup. Plus the sound is bad *** for a little car like this. I'm still trying to get some videos together so you can get a better idear of what I'm talking about.
Anyways, on with the build progress...
Another trip to Niagara Falls to get the Tein Flex coilovers and wheels.
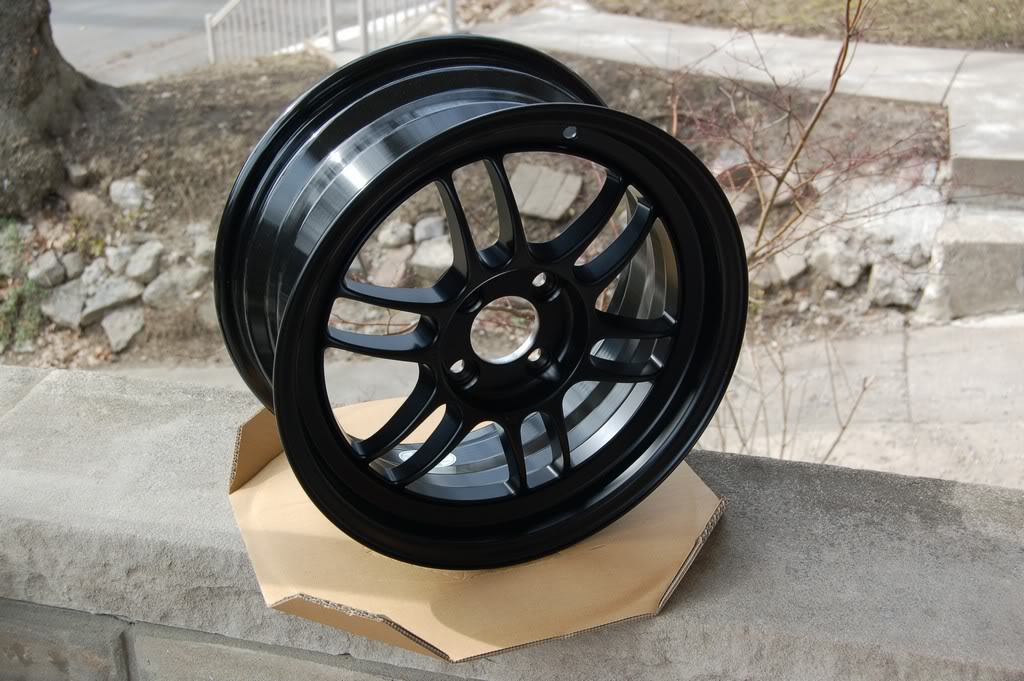
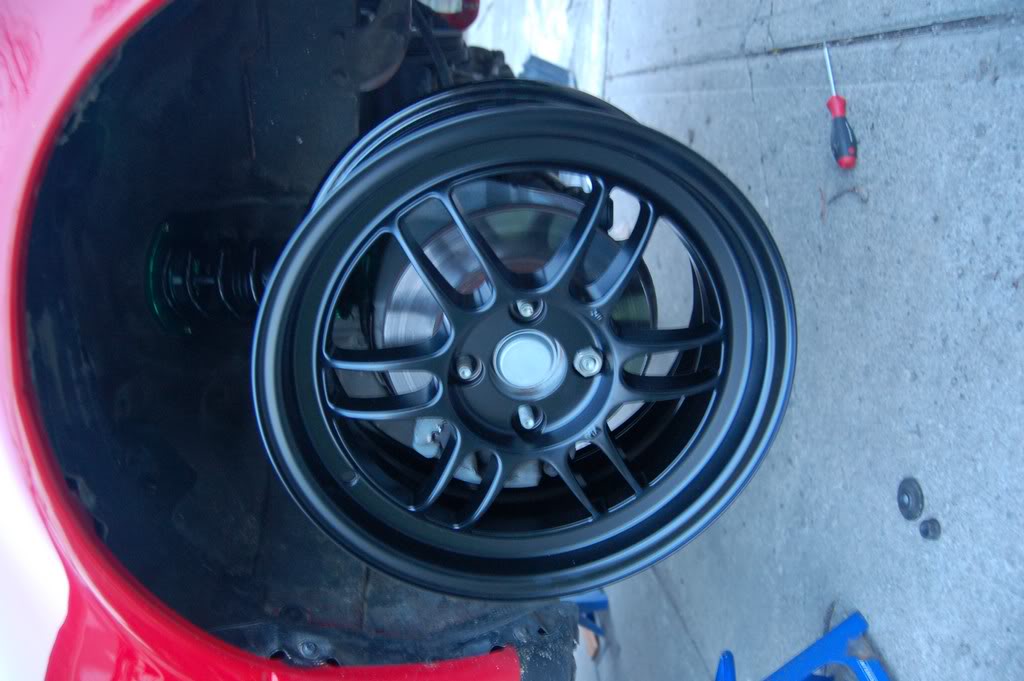
Yup, factory black RPF-1s. They are damn sexy in black. There are some red Enkei stickers that need to go on, but I will wait until the tires are mounted before putting on that finishing touch.
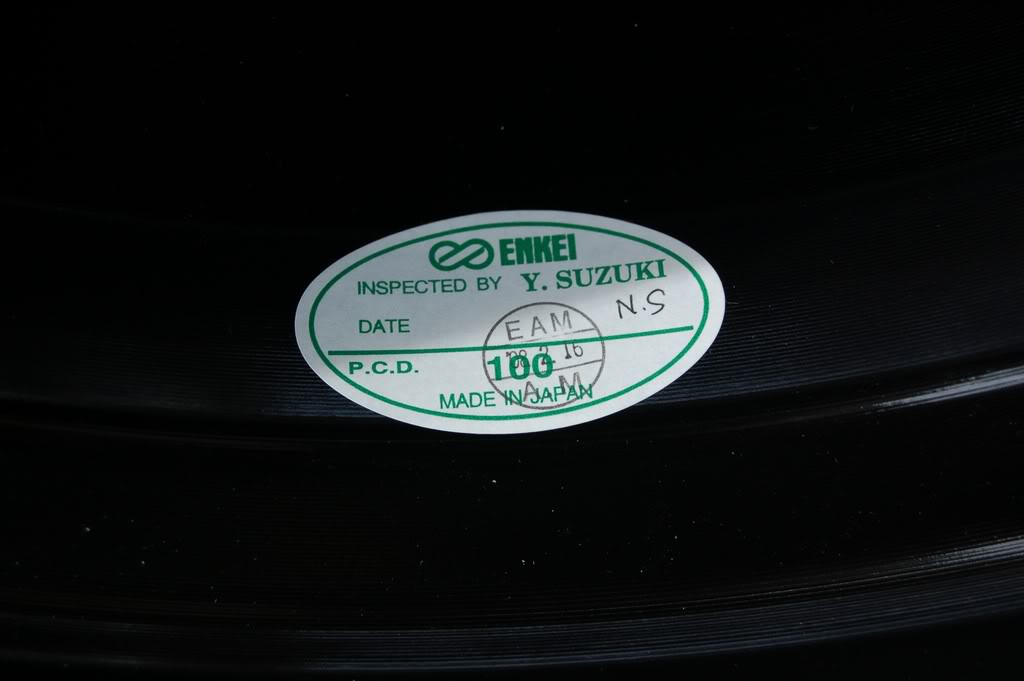
Thank you Y. SUZUKI for your inspection efforts!!
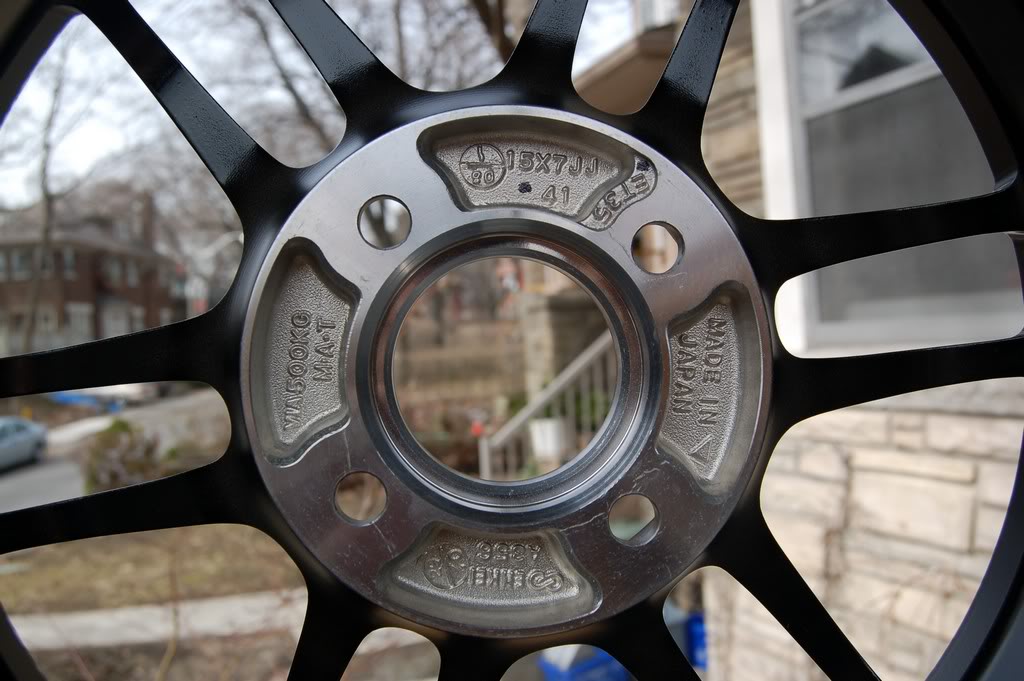
Backside. These are 35ET, although the 41 there is somewhat confusing.
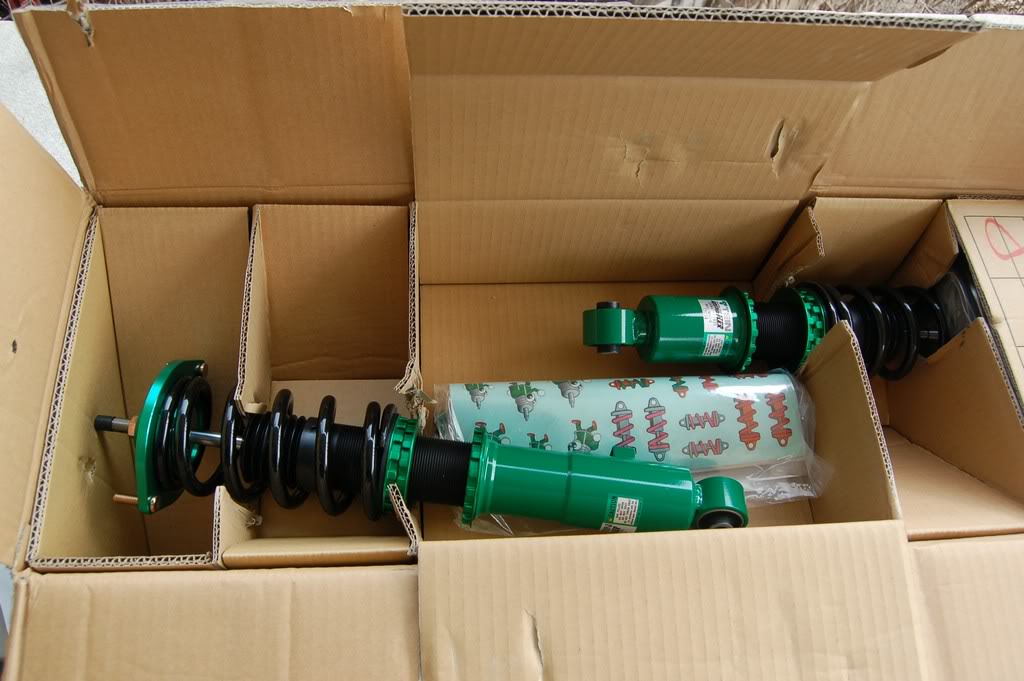
Tein goodness.
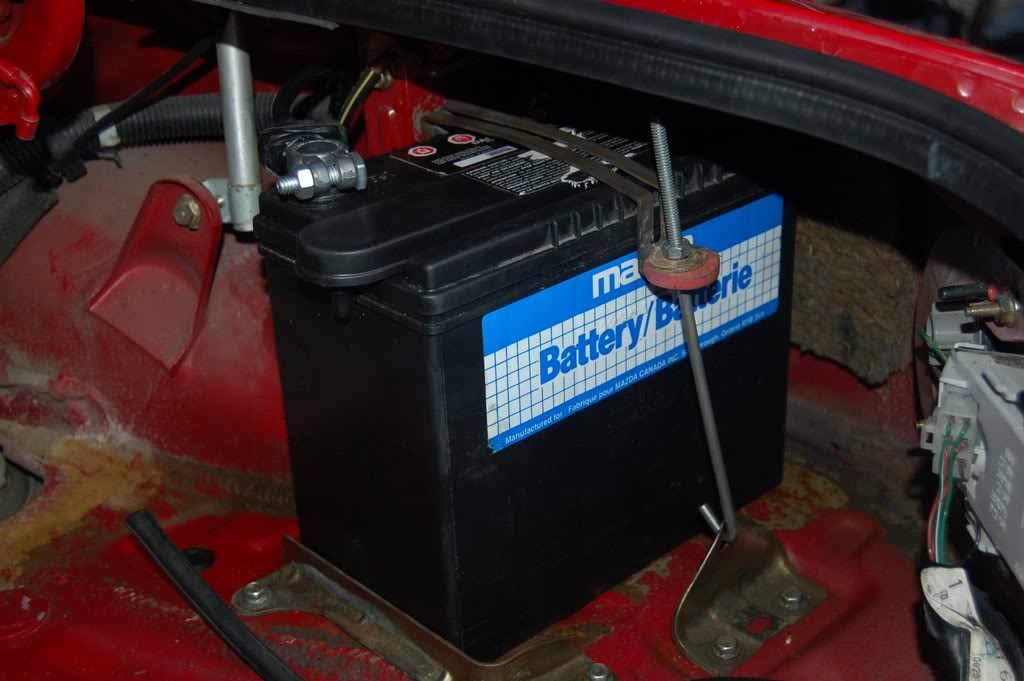
A very unexciting shot of my battery area. I bought some sandpaper and rust paint to fix this up, as well as a new battery tray from Mazda since the old one was toast. The water seems to be coming from an unplugged tube, which the battery uses as well. I plugged it up and it rained all weekend, so far so good, nice and dry. I also installed some new connectors since the old ones were quite corroded.
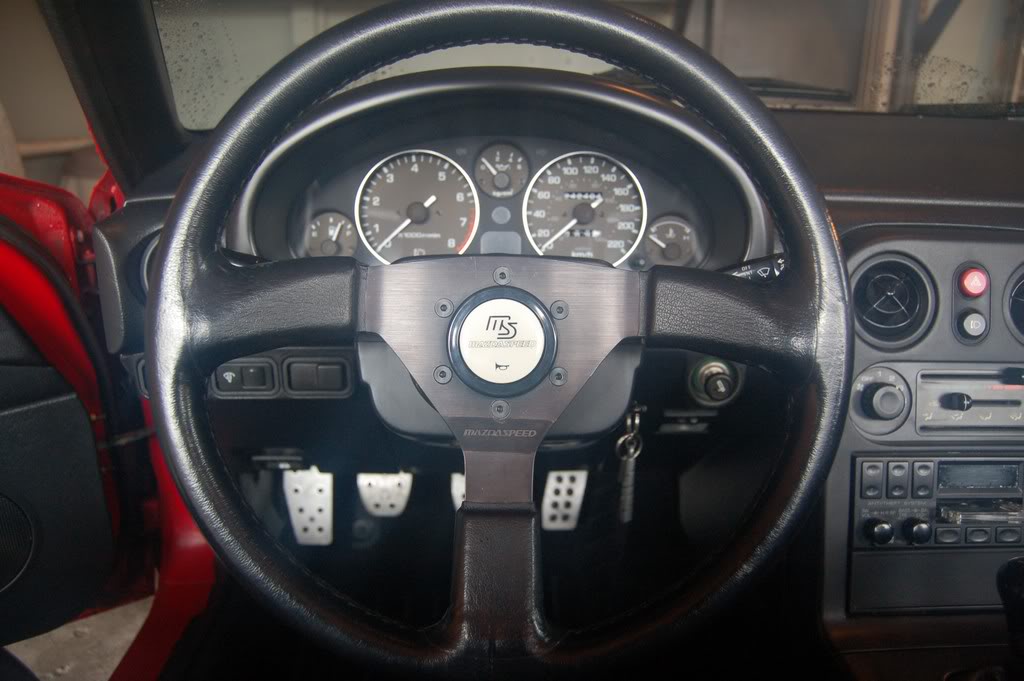
Mazdaspeed steering wheel, courtesy of Rev9. It uses a Rev9 hub as well.
I also attempted to install my Mazdaspeed strut bar which I have had since last October, and finally got around to installing a USDM washer bottle so it would fit. However, the stock upper shock bolts were not long enough to install it, so I had to postpone. Thankfully the Tein bolts are much longer so it should not be an issues.
Today was the start of the coilover install. I got the majority of the work done in a couple hours, and will likely finish on Thursday. 3 of 4 shocks are in, I'm saving the right rear until last after I do my paint touch up in the battery area.
Overall, removing the stock equipment was not too painful, just needed some PB Blaster on the bolts and some hemming and hawing. I followed the directions in Keith Tanners book, basically remove the upper control arm bolt and drop the assembly so the shock can be removed. It's easy.
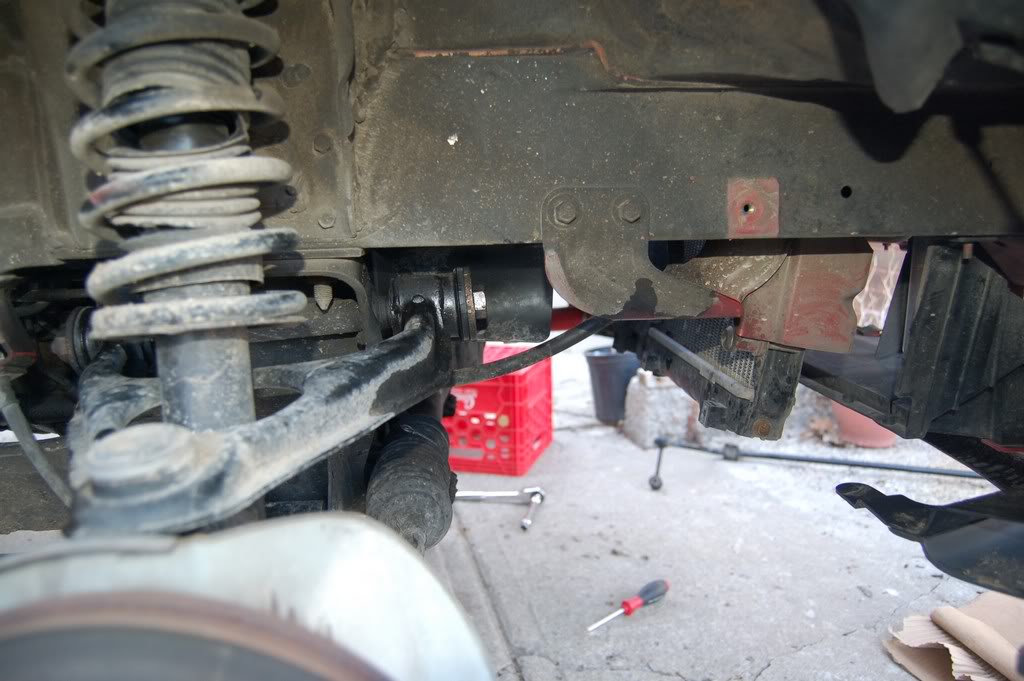
The undertray needs to be removed so you have the necessary clearances.
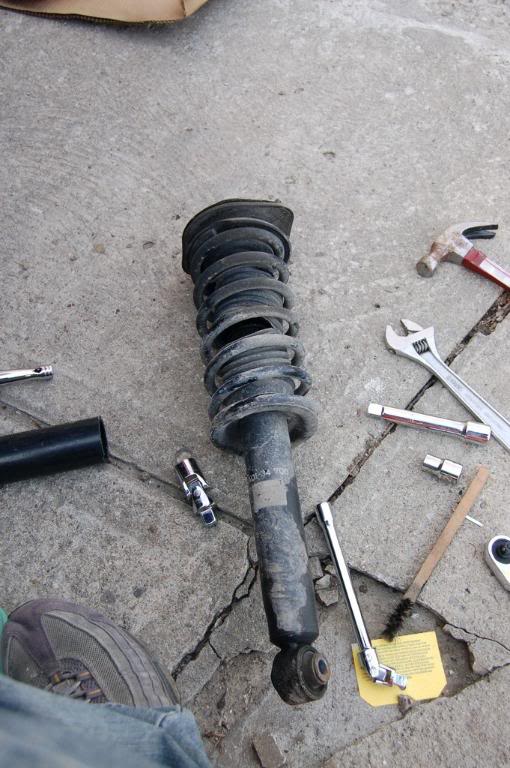
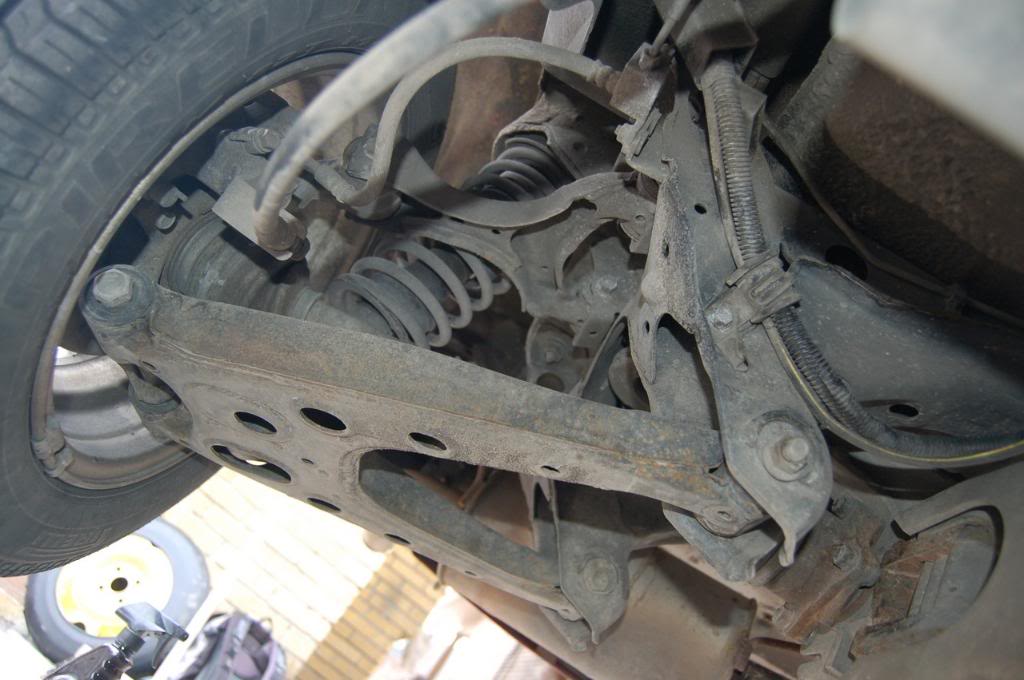
Old shock.
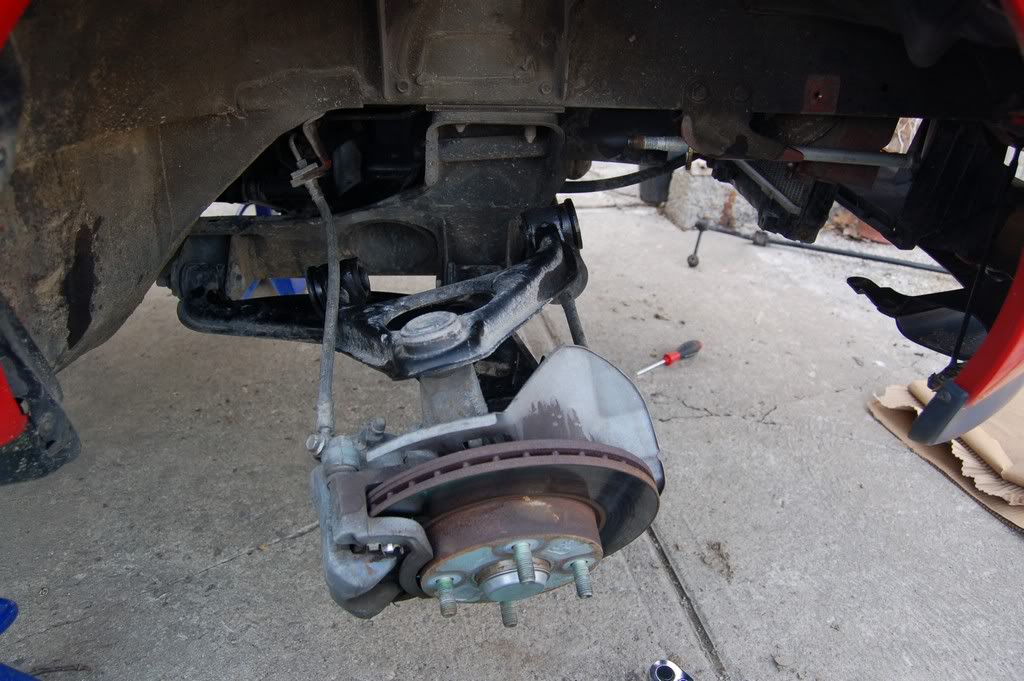
This is what happens with no shock in. Make sure you keep it elevated, or all the weight ends up on your brake line.
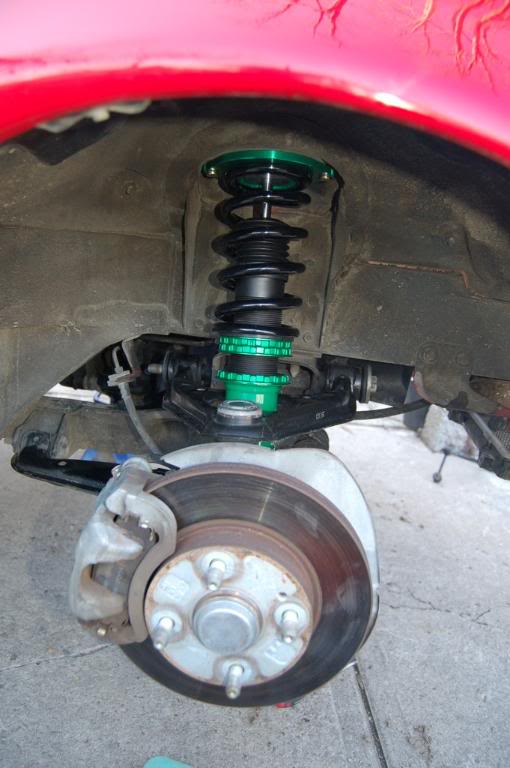
New shock fitted. Much better!! I left all the bolts loose since I am going to do the final tie down later on.
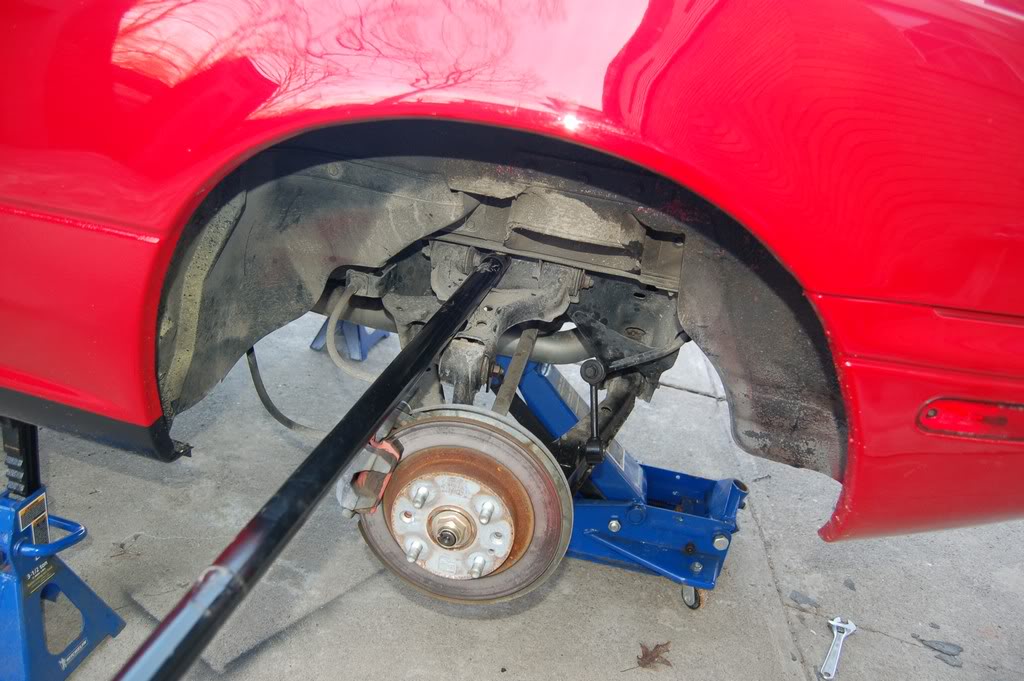
On the rear, you need to use a long bar to push the suspension assembly down to remove the shock. I just used the extra long bar that came with my jack.
Another noob moment. Since there was still tension on the rear sway bar, it ended grinding down the thread a bit. A little is OK, but you don't want too much since you won't be able to get the bolt back in or it may end up stripping the thread in the nut. I cleaned up my mess with a little file before putting it back.
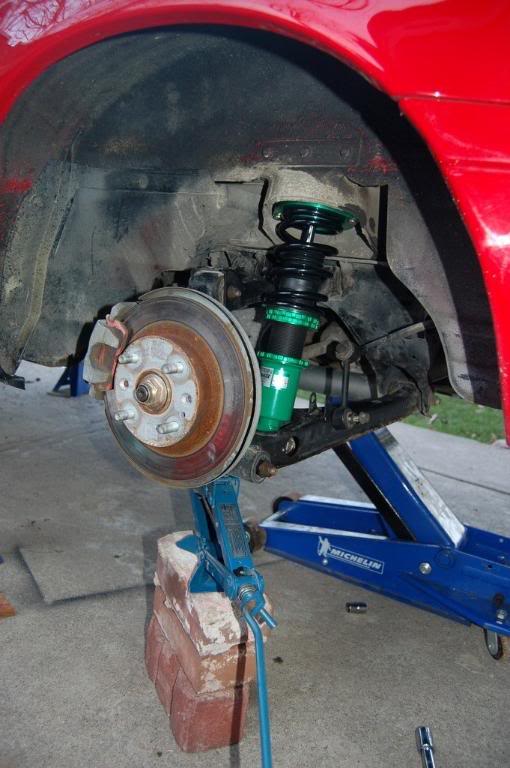
Since the rear Flex shocks are shorter than stock, you need to push the assembly up in order to have the pillow mounts go into the body properly to be bolted down. I used a couple of bricks and the OEM wheel jack to make this happen easily.

Stock upper mount. Ugh. There was a small plastic gasket included, but I didn't use that on the new shocks. Shouldn't be a problem.

Teaser shot of the new wheels, sans tires. I am hoping to get them mounted up to the Azenis on Thursday.
The growing pile of OEM equipment removed from the car. The stock sway bars will soon join that pile, to be replaced with a set of FM sways, front and rear.
Pic of today's mess.
So, I still need to finalize the shock setup with the new wheels on.. For now, to keep things simple, I will be following the recommendations in the Flex manual for installation and go from there.
Anyways, on with the build progress...
Another trip to Niagara Falls to get the Tein Flex coilovers and wheels.
Yup, factory black RPF-1s. They are damn sexy in black. There are some red Enkei stickers that need to go on, but I will wait until the tires are mounted before putting on that finishing touch.
Thank you Y. SUZUKI for your inspection efforts!!
Backside. These are 35ET, although the 41 there is somewhat confusing.
Tein goodness.
A very unexciting shot of my battery area. I bought some sandpaper and rust paint to fix this up, as well as a new battery tray from Mazda since the old one was toast. The water seems to be coming from an unplugged tube, which the battery uses as well. I plugged it up and it rained all weekend, so far so good, nice and dry. I also installed some new connectors since the old ones were quite corroded.
Mazdaspeed steering wheel, courtesy of Rev9. It uses a Rev9 hub as well.
I also attempted to install my Mazdaspeed strut bar which I have had since last October, and finally got around to installing a USDM washer bottle so it would fit. However, the stock upper shock bolts were not long enough to install it, so I had to postpone. Thankfully the Tein bolts are much longer so it should not be an issues.
Today was the start of the coilover install. I got the majority of the work done in a couple hours, and will likely finish on Thursday. 3 of 4 shocks are in, I'm saving the right rear until last after I do my paint touch up in the battery area.
Overall, removing the stock equipment was not too painful, just needed some PB Blaster on the bolts and some hemming and hawing. I followed the directions in Keith Tanners book, basically remove the upper control arm bolt and drop the assembly so the shock can be removed. It's easy.
The undertray needs to be removed so you have the necessary clearances.
Old shock.
This is what happens with no shock in. Make sure you keep it elevated, or all the weight ends up on your brake line.
New shock fitted. Much better!! I left all the bolts loose since I am going to do the final tie down later on.
On the rear, you need to use a long bar to push the suspension assembly down to remove the shock. I just used the extra long bar that came with my jack.
Another noob moment. Since there was still tension on the rear sway bar, it ended grinding down the thread a bit. A little is OK, but you don't want too much since you won't be able to get the bolt back in or it may end up stripping the thread in the nut. I cleaned up my mess with a little file before putting it back.
Since the rear Flex shocks are shorter than stock, you need to push the assembly up in order to have the pillow mounts go into the body properly to be bolted down. I used a couple of bricks and the OEM wheel jack to make this happen easily.
Stock upper mount. Ugh. There was a small plastic gasket included, but I didn't use that on the new shocks. Shouldn't be a problem.
Teaser shot of the new wheels, sans tires. I am hoping to get them mounted up to the Azenis on Thursday.
The growing pile of OEM equipment removed from the car. The stock sway bars will soon join that pile, to be replaced with a set of FM sways, front and rear.
Pic of today's mess.
So, I still need to finalize the shock setup with the new wheels on.. For now, to keep things simple, I will be following the recommendations in the Flex manual for installation and go from there.