
DIY tips for pop-up headlights (pics)

Thread Starter
Average GTcars Poster
Joined: May 2005
Posts: 400
From: Texas
Rep Power: 777 
DIY tips for pop-up headlights (pics)
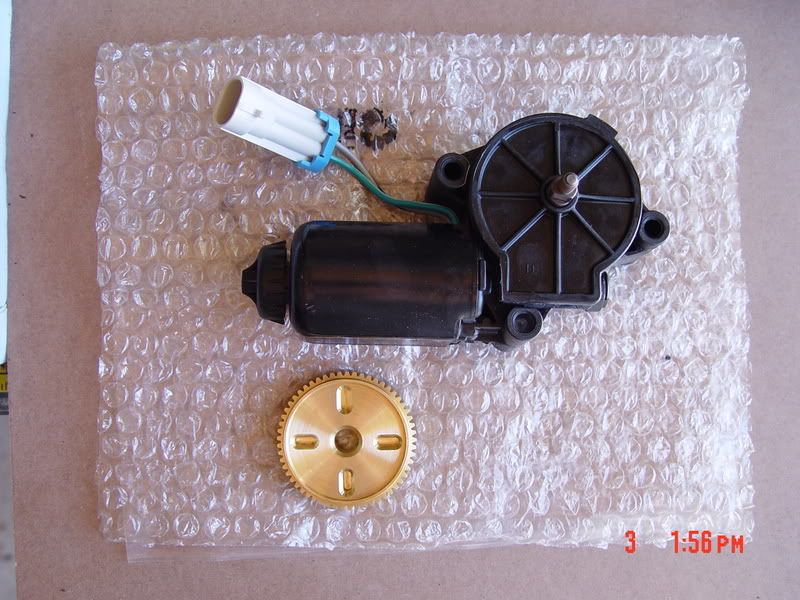
I finally got a chance to do the brass gear mod that Brent Franker sells for the F-body firebird cars. I have to say that the brass gears are very nice, well thought out and precision pieces. This may not be one of my most interesting threads for pics, but I thought it was valuable to show some install pics and re-inforce the ease of this mod. You will need a few things to do this mod update.
1. Dremel & small plastic cutting wheel
2. Regular screwdriver medium sized
3. Good grease (Worth, etc.)
4. Patience (lots of)
I purchased two new motors about 1 year ago and the price of these things just keep going up ($175 each). If you have shaking headlights one of the problems can be in the lift-arm that attaches to the actuator (small bushing at the hinge point in the middle). I had this problem on my drivers side headlight. If any part of the lift-arm or actuator fails/damaged you will have to purchase the entire assembly to get either of the parts. So, I purchased the actuator just to get the lift arm. I then decided what the hell, bought two new actuators for both sides and brass gears. Do it once and do it right
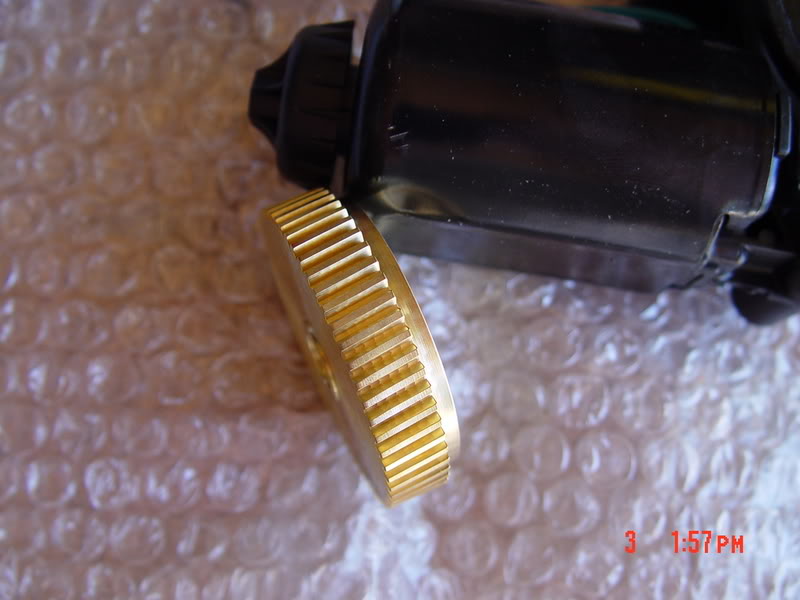
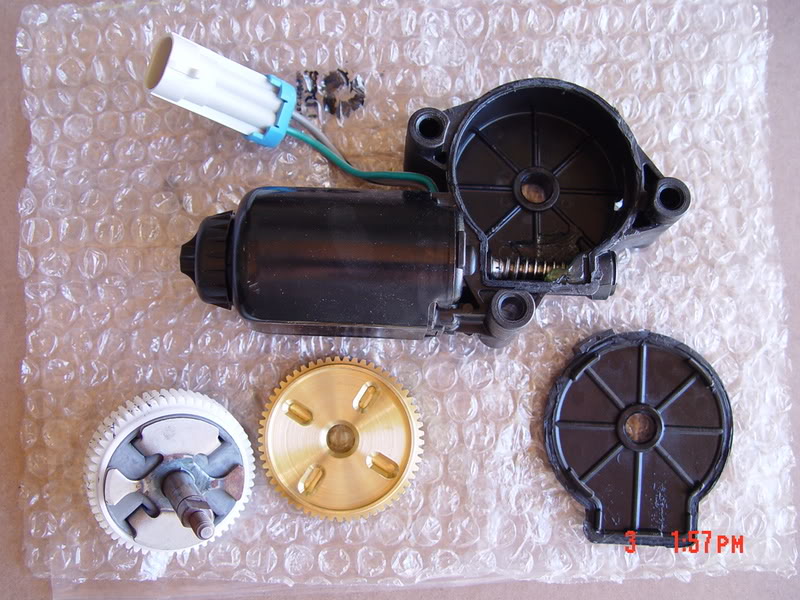
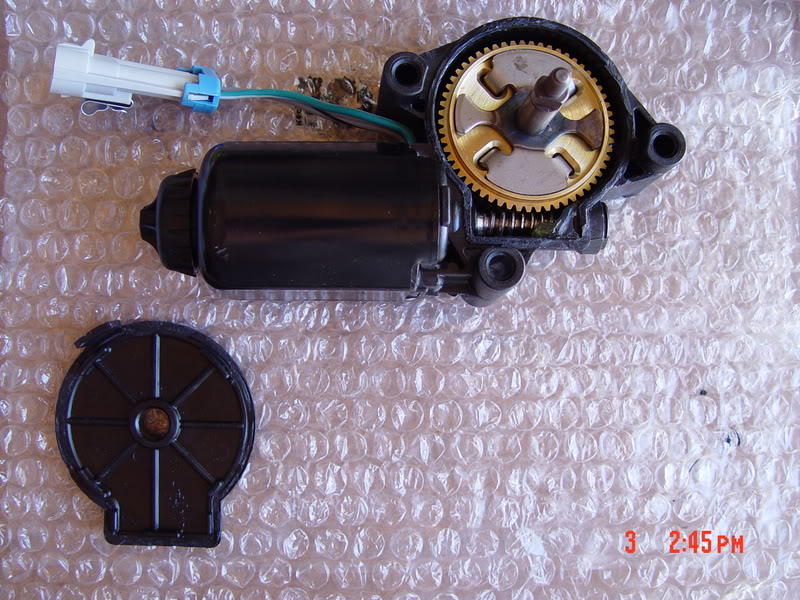
  You will need to use a plastic cutting wheel to remove the cover and access the stock nylon gear. Some of the things that brent does not point out in his how to guide. When you try to seat the flat plate with tabs it does not usually fit into the brass gear very well. I had to slightly bend the tabs and file the edges of the plate to get both plates to seat in the brass gears. Everything re-assembles nicely (if your cuts are good), but you do have to make a little bit of a mess with the epoxy compounds trying to apply it evenly to both cases. It will require that you setup the epoxy for a minimum of 24 hours and then allow to cure for a period of 7 days. This step is highly reccomended if you want the covers to stay on the actuator. Re-install in a week and enjoy the thought of never having to replace a damn actuators again
I know most of the guide is available to follow on-line, but I wanted to share a few pointers and let anybody know they can PM me with any specific questions on this mod if they need help.
PICS:
1. Dremel & small plastic cutting wheel
2. Regular screwdriver medium sized
3. Good grease (Worth, etc.)
4. Patience (lots of)
I purchased two new motors about 1 year ago and the price of these things just keep going up
($175 each). If you have shaking headlights one of the problems can be in the lift-arm that attaches to the actuator (small bushing at the hinge point in the middle). I had this problem on my drivers side headlight. If any part of the lift-arm or actuator fails/damaged you will have to purchase the entire assembly to get either of the parts. So, I purchased the actuator just to get the lift arm. I then decided what the hell, bought two new actuators for both sides and brass gears. Do it once and do it right You will need to use a plastic cutting wheel to remove the cover and access the stock nylon gear. Some of the things that brent does not point out in his how to guide. When you try to seat the flat plate with tabs it does not usually fit into the brass gear very well. I had to slightly bend the tabs and file the edges of the plate to get both plates to seat in the brass gears. Everything re-assembles nicely (if your cuts are good), but you do have to make a little bit of a mess with the epoxy compounds trying to apply it evenly to both cases. It will require that you setup the epoxy for a minimum of 24 hours and then allow to cure for a period of 7 days. This step is highly reccomended if you want the covers to stay on the actuator. Re-install in a week and enjoy the thought of never having to replace a damn actuators again I know most of the guide is available to follow on-line, but I wanted to share a few pointers and let anybody know they can PM me with any specific questions on this mod if they need help.
PICS:


Thread
Thread Starter
Forum
Replies
Last Post
Currently Active Users Viewing This Thread: 1 (0 members and 1 guests)